Configure Screen
This article is incomplete & needs to be reviewed. You can help by creating a pull request.
Overview
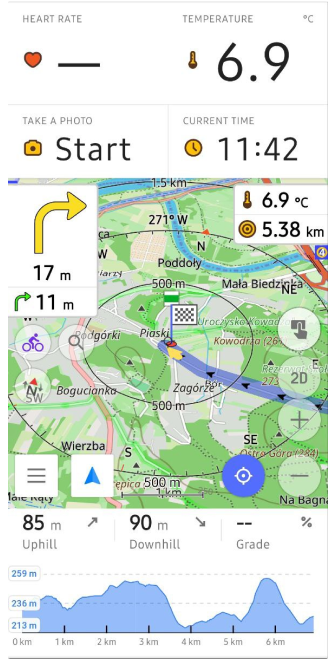
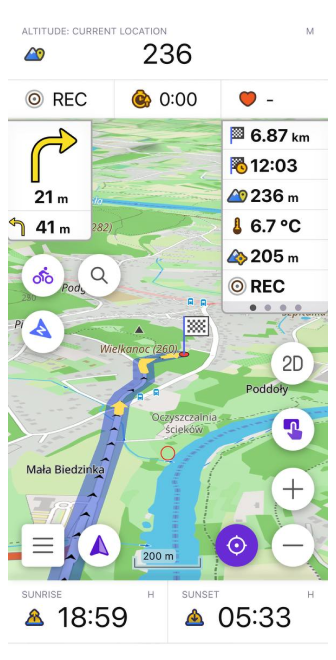
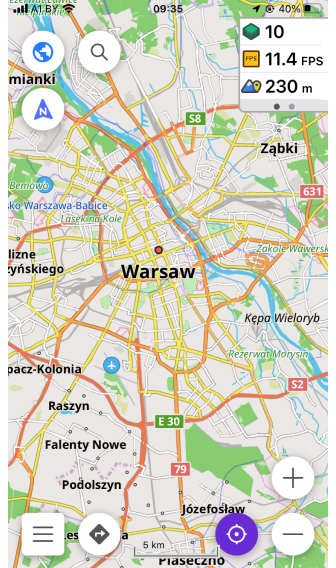
Configure screen is a menu that allows you to customize the widgets that will be displayed on the map. On this screen, you can enable information and navigation widgets, buttons, a ruler, and add quick actions.
All widgets are profile dependent, so if you change the order, visibility, or state for one profile, they will not apply to other profiles. Each profile has its own predefined list of widgets based on the navigation screen design. It can be configured and used with or without navigation.
- Android
- iOS
Menu → Configure screen
Menu → Configure screen
- Overview
- Widget panels
- Top / Bottom panels
- Left / Right panels
- Panel widgets settings
- Actions
- Buttons and Other
- Switch profile
Widget panels
- Android
- iOS
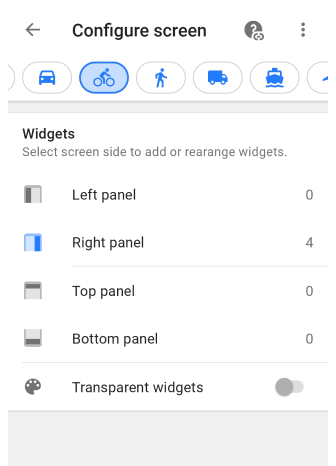
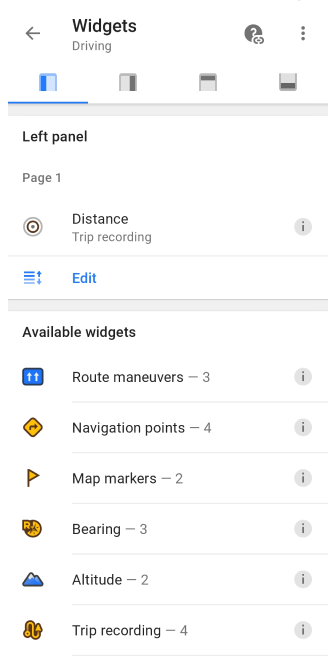
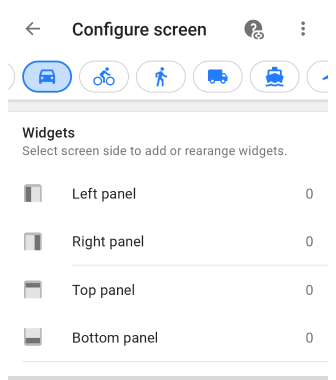
Menu → Configure screen → Widgets
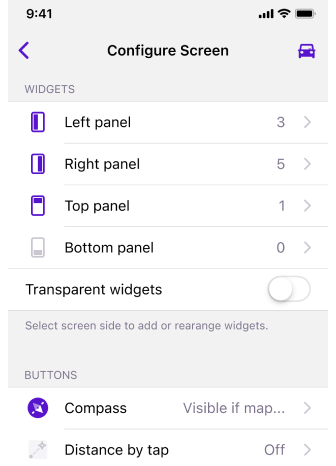
Menu → Configure screen → Widgets
OsmAnd application allows you to group, copy and customize widgets in various ways, move them in the list and delete widgets added to the screen.
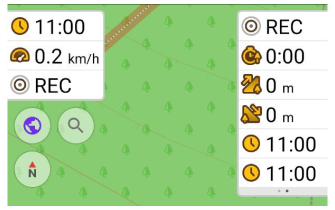
Widget panels help you to arrange widgets on the application screen in a convenient place for you. Widget panels help you to arrange widgets on the application screen in a comfortable place. These can be rows on the Right/Left or Top/Bottom.
Widgets for all panels
- Android
- iOS
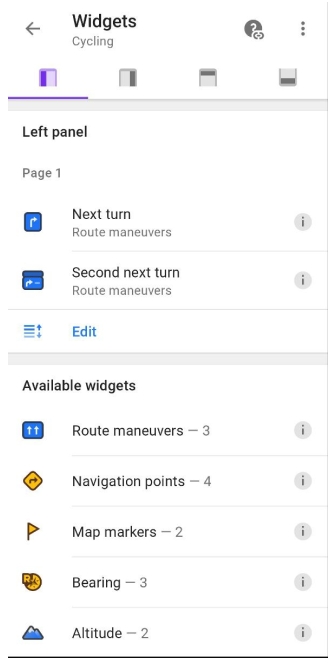
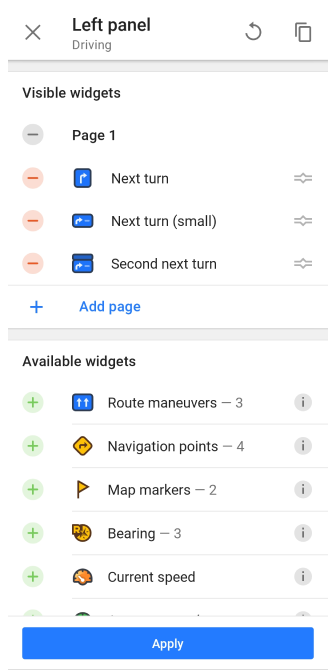
Route maneuvers (only for Left/Right panel) This set of navigational widgets is activated during navigation and display information about the distance to the next maneuver.
3 widgets included: Next turn, Next turn (small), Second next turn.Navigation point A set of navigation widgets shows the remaining distance to a destination, intermediate point, arrival time to an intermediate point, or travel time for a calculated route.
4 widgets included: Distance to destination, Distance to intermediate, Time to intermediate, Time to destination.Map markers A set of widgets shows the distance or estimated time of arrival (ETA) for the first two markers in the list of map markers. show special points marked as flags on the map. 2 widgets included: First marker, Second marker.
Bearing This set of navigational widgets shows the absolute or relative bearing to a target in angular units (in 180 degrees, 360 degrees, or milliradians mode).
3 widgets included: Relative bearing, Magnetic bearing, True bearing.Current Speed Informational widget shows the current speed detected by the GPS sensor.
Average speed Informational widget shows the average speed of the current trip.
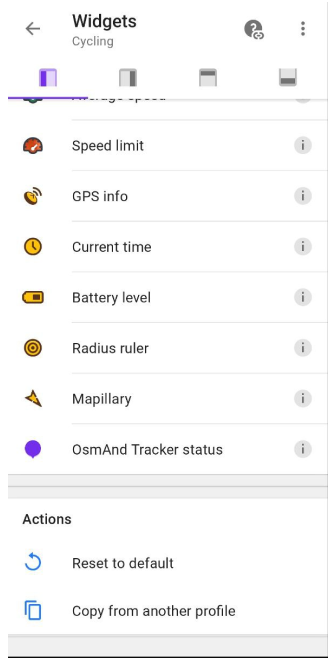
Speed limit A set of informational widgets displays the speed limit on the current road you are traveling on.
Altitude A set of informational widgets displays the altitude above sea level for the current geolocation or the altitude above sea level for the current map center.
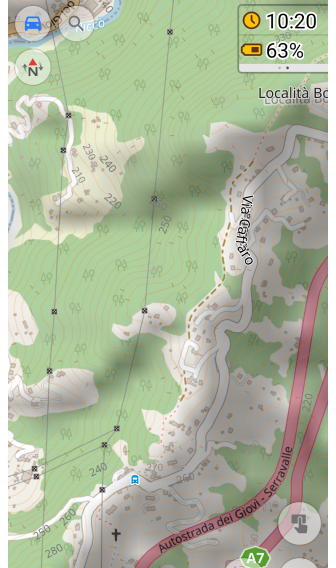
2 widgets included: Altitude: current location, Elevation: map center.Current time Informational widget displays the current time taken from your device.
Battery level Informational widget shows battery level of your device.
Radius ruler The widget displays on a map the distance between the user's location and the inner point of the distance circles of the Radius ruler tool.
Glide ratio The widgets show the glide ratio to the target and the average glide ratio for the current flight.
2 widgets included: Glide ratio to target, Average glide ratio.Sunrise, sunset A set of informational widgets shows the time of the next sunrise or sunset for the center of the map.
2 widgets included: Sunrise, Sunset.OsmAnd Tracker status This informational widget is used to quickly access the OsmAnd Tracker application to share your location with other users.
GPS info (Android only) Informational widget shows the number of satellites the device is currently detecting and using.
Developer widgets (from Development plugin) A set of informational widgets provides information about zoom level, map rendering speed, map center elevation above sea level, distance to the map center, camera height and tilt and available RAM on your device.
5 widgets included: Map rendering FPS, Camera tilt, Camera elevation, Zoom level, Distance from camera to target, Available RAM.Mapillary (from Mapillary plugin) Informational widget provides quick access to Mapillary app to add street images.
Parking (from Parking position plugin) Informational widget shows the distance from the center of the screen to the parking location.
Wheather (from Weather plugin) A set of informational widgets displays detailed weather data.
5 widgets included: Temperature, Air Pressure, Wind, Cloud, Precipitation.Trip recording (from Trip recording plugin) A set of informational widgets provides quick access to start and stop track recording.
4 widgets included: Distance, Duration, Uphill, Downhill.Audio/video notes (from Audio/video notes plugin) This set of informational widgets provides quick access to start/stop taking an audio, video or photo notes.
4 widgets included: On request, Record audio, Record video, Take a photo.External Sensors widgets (from External sensors plugin) A set of informational widgets help you track data from your external sensors in real time.
6 widgets included: Heart Rate, Bicycle Power (Android only), Bicycle Cadence, Bicycle Speed, Bicycle Distance, Temperature.Speedometer. Shows the current speed based on GPS data and and limited speed based on OpenStreetMap data.
Top / Bottom panels
- Android
- iOS
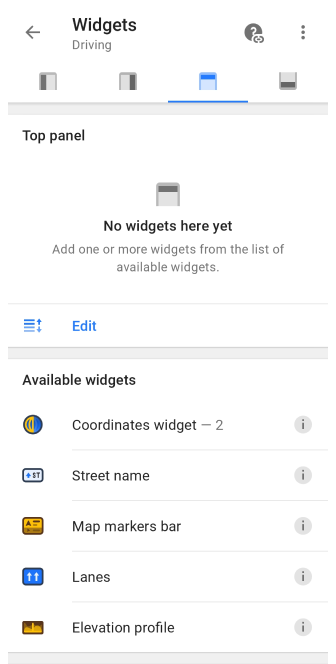
Menu → Configure screen → Widgets → Top / Bottom panel
Menu → Configure screen → Widgets → Top / Bottom panel
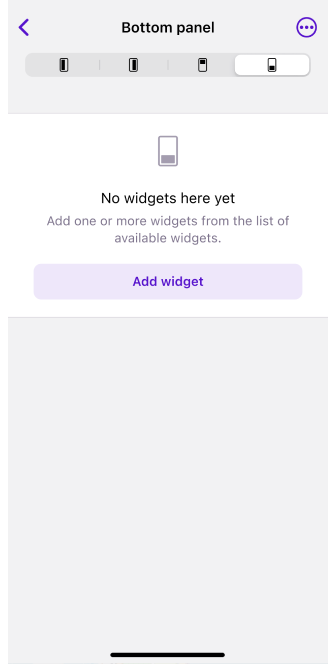
The OsmAnd app allows you to place widgets in top or buttom and group them by rows.
Types of widgets are available for Top / Bottom panels:
All widgets from other panels.
Coordinates widgets. This set of informational widgets displays the geographic coordinates of the current geolocation.
2 widgets included: Coordinates: map center, Coordinates: current location.Street name. Navigational widget shows the current street name with a straight arrow or the next street name with an arrow pointing to an upcoming turn.
Lanes. Navigational widget shows the current road lanes layout and highlights lanes for traffic with active navigation.
Map markers bar. The widget displays the distance and direction to the next Map marker from your current location.
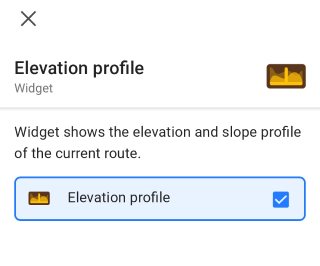
The widget can be configured to show 1 or 2 markers.Elevation profile (Android only). Navigational widget shows the elevation and slope profile of the current route.
Rows for panels
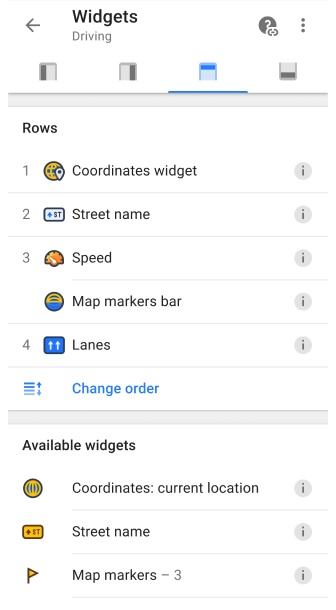
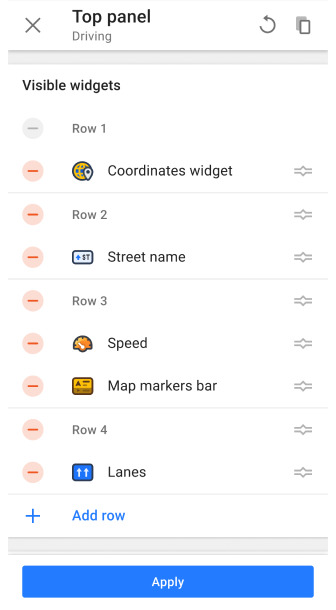
There is a Row mode for the top and bottom panels, which can be used to add as many rows as you need to the application screen to place widgets on them.
How to do it:
- Add the required widgets from the list of Available widgets.
- Tap the Change order button below the list of added widgets.
- Find the Add row button at the bottom of the list.
- Widgets can be moved between rows.
- Tap the Apply button.
The mode allows you to add more than one widgets in a single row on the top and bottom panels to display as many information as needed. Restrictions:
A row can contain only one Complex widget that has a unique display. These widgets include:
For all rest Simple widgets that only display information such as Widget Name, Units of measurement, Value, and Icon, there is a option to add several to one panel at once.
Settings

Change widget size
Size customization is available for all Simple widgets in the Top and Bottom panels. You can choose the size that best suits your needs:
- Small. This size is suitable for narrow widget display, saving more screen space for maps and widgets on other panels, especially if you have a small device.
- Medium. This is the default widget size. It provides a balance between information visibility and screen space usage.
- Large. The size is suitable for you if you need larger and more visual information in the widget.
Hiding widget icons
For all widgets belonging to Simple, you can hide the icons located on the widget fields. This makes it possible to free up space for useful information. For example, if there are several widgets in the Row, the information is better visible.
Individual size for different rows
The size of each widget can be customized individually, which means that you can set different sizes of widgets by changing the size of the row. However, it is important to take into account that if there are several widgets in one row, then changing the size of one of them automatically applies to all widgets in this row and, accordingly, to the size of the row as a whole.
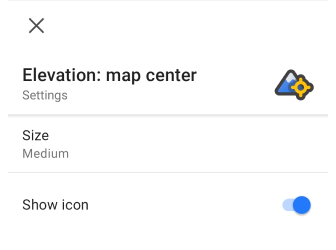
To change the widget size and icon visibility:
- Select a widget that you have already added to the panel.
- Tap the Settings icon on the right side of the widget field.
- Tap the Size setting and select one of the available sizes.
- Switch to the Off position, in the Show icon field.
Left / Right panels
- Android
- iOS
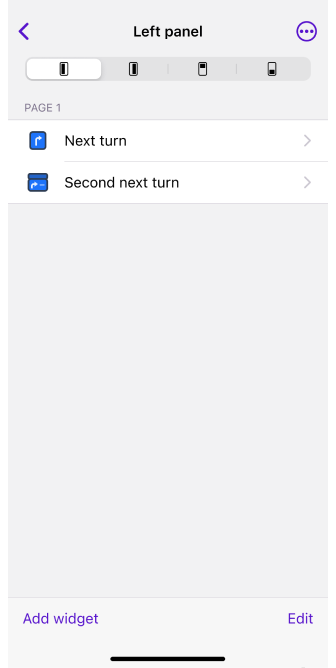
Menu → Configure screen → Widgets → Left / Right panel
Menu → Configure screen → Widgets → Left / Right panel
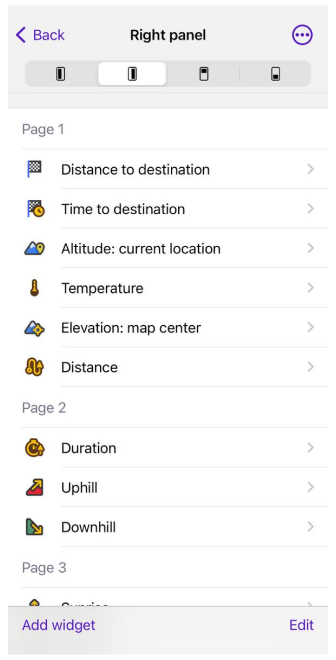
The OsmAnd app allows you to place widgets from the table in sidebars and group them by pages.
Pages for widgets
- Android
- iOS
Menu → Configure screen → Right panel / Left panel → Edit → Add page
Menu → Configure screen → Right panel / Left panel → Edit → Add page
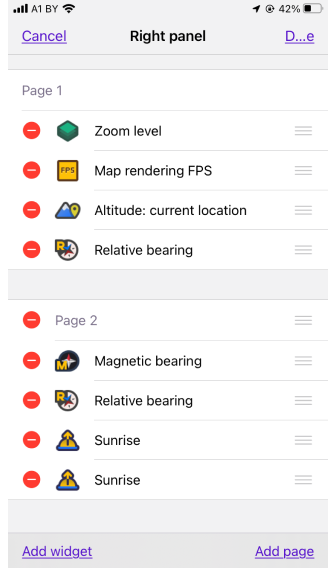
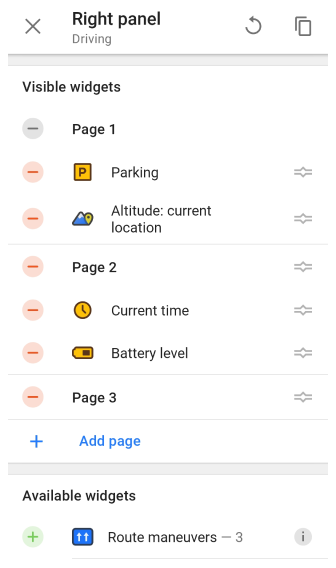
Widgets in the right and left panels can be grouped into Pages. To do this, select a panel, tap Edit, and then tap Add Page. This helps you interact with the map more easily and without distractions when navigating, as well as having multiple sets of widgets for different cases.
Panel widgets settings
Copies of widgets
OsmAnd menu → Configure screen → Widgets → Panel → Add chosen widget
Copies can be shown simultaneously for the all panels, as well as for each page of the widget. To find the required options, follow the steps below:
- Add the widget you need and tap it.
- In the list of actions, select the Duplicate button.
- Another option. Select the same widget in the Available widgets list and tap the Add button.
Move / Delete
OsmAnd menu → Configure screen → Widgets → Panel → Add chosen widget
To remove or delete a widget from the application screen, you need to select the required panel and then press the Edit button.
- To move a widget to the required location or page, long tap the icon on the right and select a position in the widget list.
- To no longer see the widget, tap the minus icon to the left of its name.
Actions
- Android
- iOS
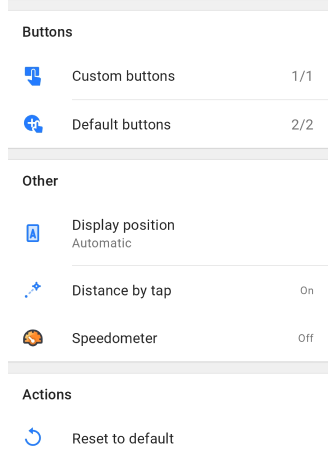
Menu → Configure screen → Actions

Menu → Configure screen → Any panel
Access to additional actions in the Configure screen are:
- Android. Located in Configure screen at the bottom of the screen in the Actions section: Menu → Configure screen → Actions.
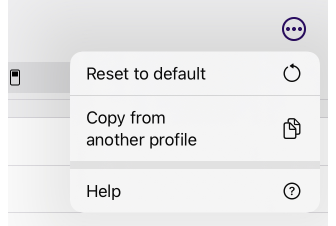
- Android / iOS. Located on the screens of each Panel in the three-dot menu in the upper right corner of the screen.
Available actions:
- Reset to default. This feature allows you to reset all settings to default values if you want to start over, or use only the preset ones when starting OsmAnd.
- Copy from another profile. This feature allows you to quickly import settings from another profile, select the required ones from the list, and copy.
Buttons and Other
- Android
- iOS
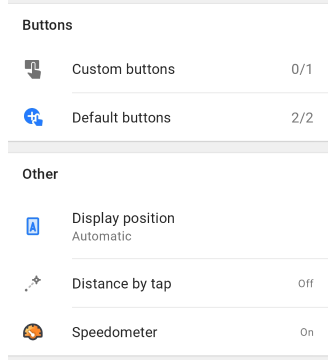
Buttons:
- Custom buttons. Allows you to add a list from Quick action.
- Default buttons. It gives you the ability to hide or show buttons on the map.
- 3D mode. Appears in the list and is available for setting if the map rendering engine Version 2 (OpenGL) is selected.
- Compass. Indicates how the map is oriented on the device. 3 views: Always visible, Always hidden, Visible if map is rotated.
Other
- Display position. Allows you to set the placement of the cursor My location on the Osmand map. There are three options available:
- Center. The cursor is always positioned in the center of the screen.
- Bottom. My location is placed slightly below the center of the screen. This mode allows you to see more map information ahead of your movement, which is very useful during navigation.
- Automatic. Places My location depending on Map orientation (Bottom for movement direction, Center - for all others).
- Distance by tap. Gives the ability to measure the distance from your position to the selected point.
- Speedometer. Shows the current speed based on GPS data and and limited speed based on OpenStreetMap data.
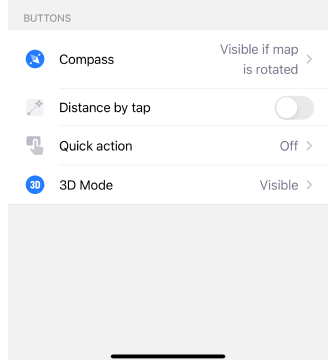
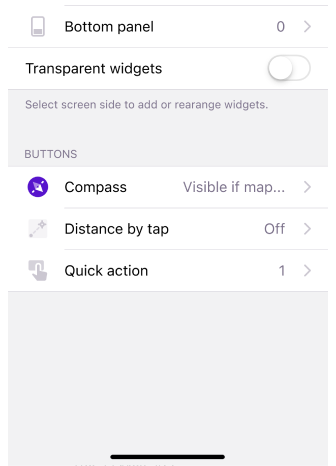
Buttons:
- Compass. Indicates how the map is oriented on the device. 3 views: Always visible, Always hidden, Visible if map is rotated.
- 3D mode. Appears in the list and is available for setting if the map rendering engine Version 2 (OpenGL) is selected.
- Distance by tap. Gives the ability to measure the distance from your position to the selected point.
- Quick action. This is a button that provides quick access to frequently used actions.
Switch profile
- Android
- iOS
- For Android devices, you can change profiles at the top of the Configure Screen home screen using the profile icons that are available.
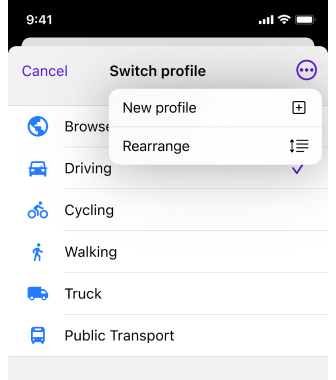
- If you are using an iOS device, tap the profile icon in the top corner of the Configure Screen home screen and select the required profile from the list to activate it.
Take note. The Switch profile option does not display all existing profiles, but only those that have been switched on in the Settings menu.