Mapillary
Overview
To get around faster, in OsmAnd you can use street-level views of your routes or places of interest provided by Mapillary (an internet connection is required).
The Mapillary layer brings street-level imagery straight into the OsmAnd app. So you can easily overview the surroundings of any place of interest or along the route you have planned. If imagery is missing, you can add it by yourself and others can make use of it. This feature has emerged from our collaboration with the Mapillary team uniting the benefits of both apps.
Setup
To display street-level images on the OsmAnd map, you need to make the following settings:
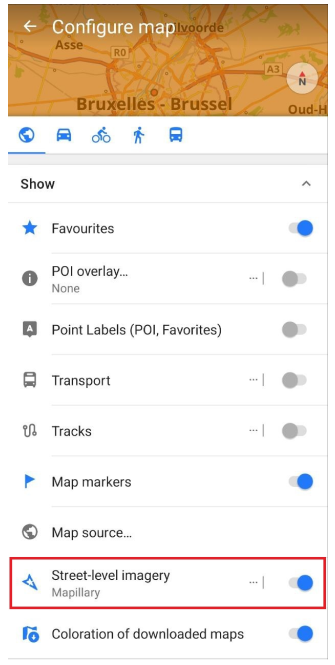
- Enable the Mapillary plugin in the Plugins section of the Main menu.
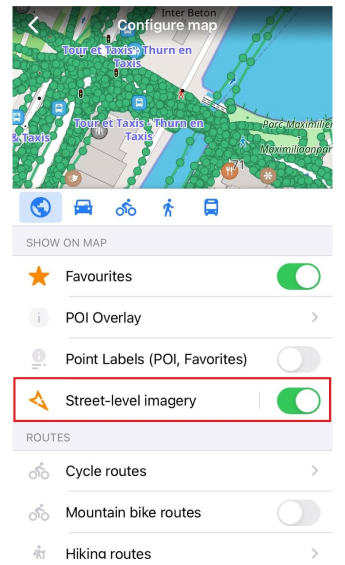
- Display the Street-level imagery on the map for the required profile in the Configure map menu.
Map Layer
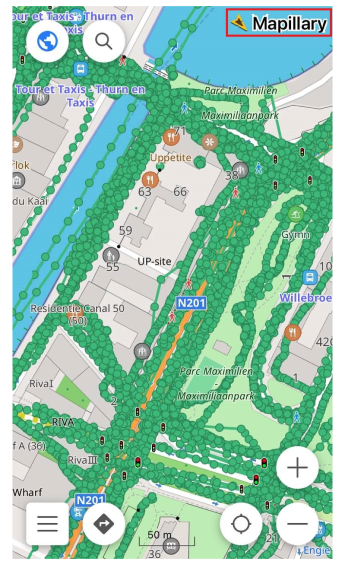
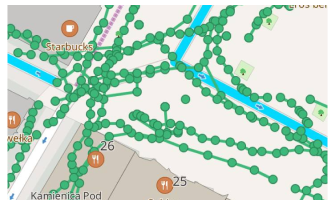
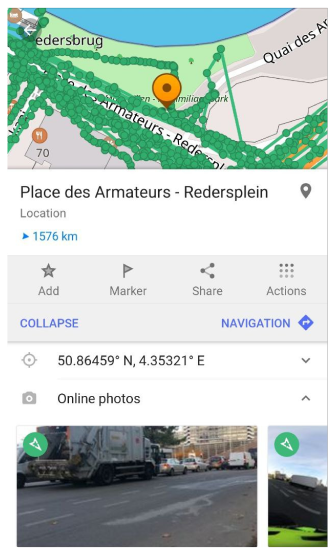
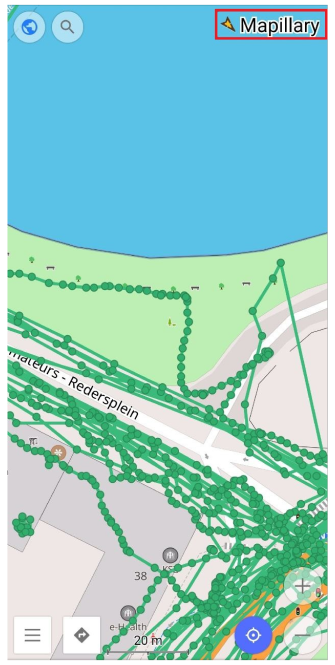
Map layer of street-level imagery is displayed on the OsmAnd map as rows of connected green dots. Mapillary user’s photos are attached to these green points. To open the street-view photo, you need to press on the green point and pictures of a selected place will be shown. You can create a filter and select what photos you would like to display on the map.
- Android
- iOS

Enable Layer
To display street-level imagery on the map, you need to enable layer first in Configure Map section of Main menu: Menu → Configure map → Street-level imagery.
- Android
- iOS
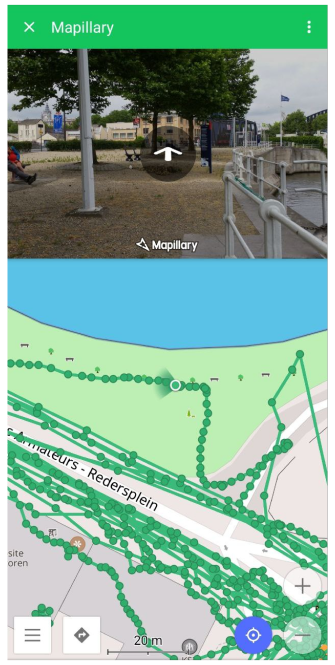
- Tap on ⁝ button to open chosen image in Mapillary application.
- Tap on an arrow to move from image to image.
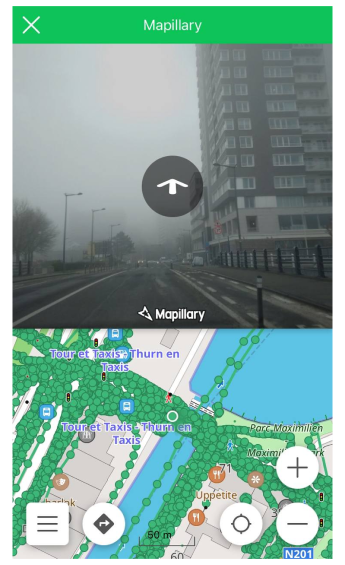
- Tap on an arrow to move from image to image.
Filtering the data
You can create a filter and select which photos you would like to display on the map, for example so you can view only newer images or only 360-degrees. Go to Menu → Configure map → Street-level imagery→ … .
- Android
- iOS
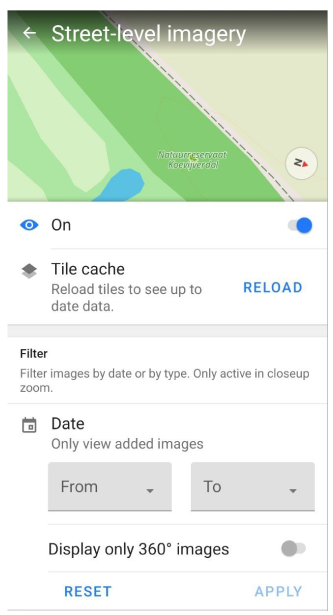
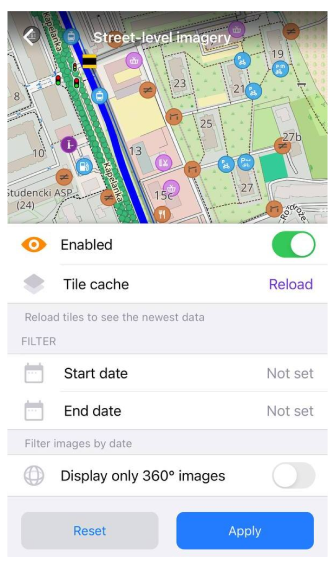
Use reload tile cache if the selected images are not displayed.
Map Context menu
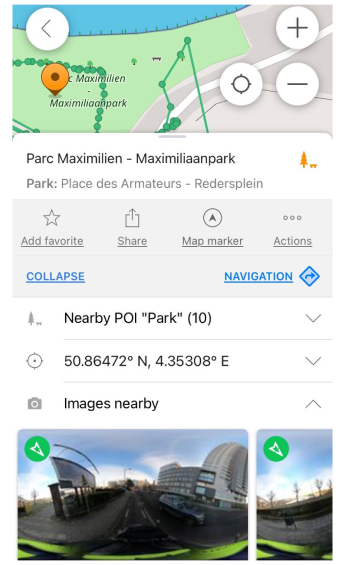
You can also view nearby Mapillary photos (40 m radius) in the Map Context menu of a selected point on the map.
- Android
- iOS
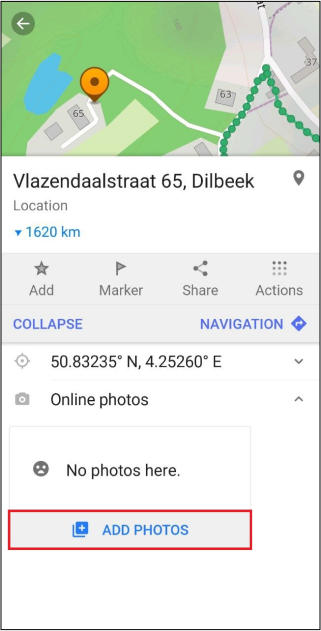
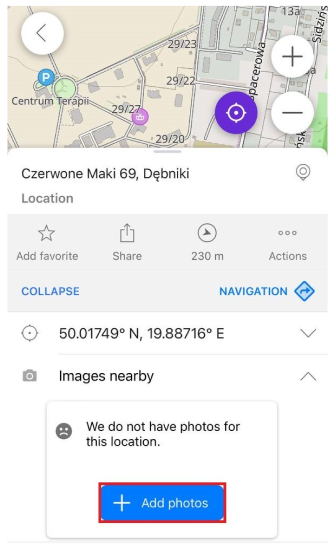
Add Photos
In order to add photos you will need to register in the Mapillary application. You can also add photos in the Map Context menu by clicking on button "Add photos" in Online photos of Map Context menu. Then the window of the Mapillary application will open.
- Android
- iOS
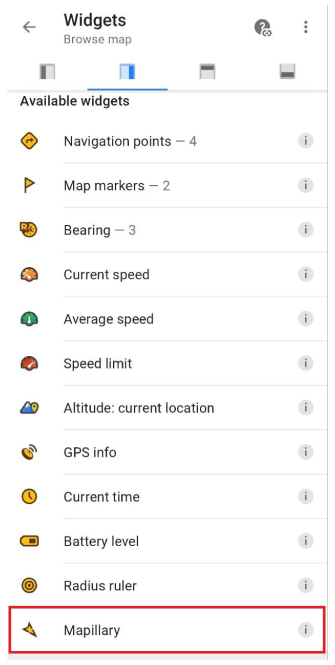
Mapillary Widget
The Mapillary widget is used to get quick access to the Mapillary application. The widget is added to the main screen automatically when the Mapillary plugin enabled. You can enable or disable the Mapillary widget and other widgets in the Configure screen section of the Main Menu.
- Android
- iOS
Menu → Configure screen → Right panel / Left panel → Mapillary
Menu → Configure screen → Right panel / Left panel → Mapillary