Informational Widgets
Overview
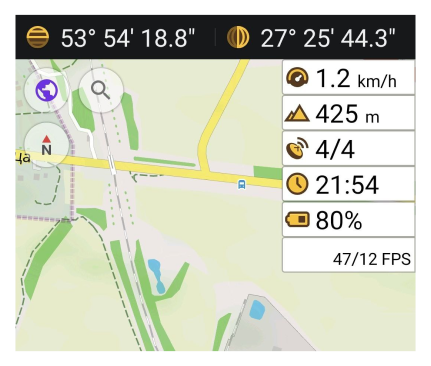
Informational widgets provide you with quick access to important data. This can be data on speed, weather, parking position, data from external sensors, and much more. Widgets can be configured according to your specific requirements, enabling their visibility on the application screen or disabling them if necessary.
Altitude Widgets
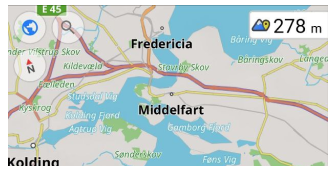
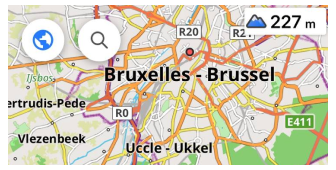
Altitude widgets display the height above the sea level of the current geolocation and the elevation of the map center.
Altitude: Current Location
On some Android devices, the altitude can display inaccurately. To solve this problem, download a map with altitude correction.
- Go to: Menu → Maps & Resources → All Downloads → World maps → World altitude correction.
- For more details, visit Maps & Resources.
- Android
- iOS
| Enable | Android: Menu → Configure screen → Choose a panel → Add widget → Altitude: current location |
| iOS: Menu → Configure screen → Choose a panel → Add widget → Altitude: current location | |
| By tapping | No changes |
| Long tap | Opens the Context menu of the widget |
| Format | Menu → Settings → App profiles → General settings → Units & formats → Units of length |
Elevation: Map Center
Elevation: map center widget is an OsmAnd Pro paid feature  .
.
- Android
- iOS
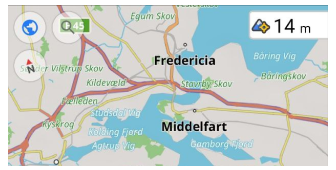
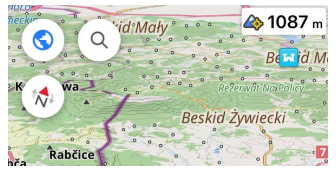
You can use the widget to find out the elevation of the current map center above sea level. A Terrain map (Hillshade and Slope) of the required area is needed to display information in the Elevation: map center widget.
| Enable | Android: Menu → Configure screen → Choose a panel → Add widget → Elevation: map center |
| iOS: Menu → Configure screen → Choose a panel → Add widget → Elevation: map center | |
| By tapping | No changes |
| Long tap | Opens the Context menu of the widget |
| Format | Menu → Settings → App profiles → General settings → Units & formats → Units of length |
Current Time
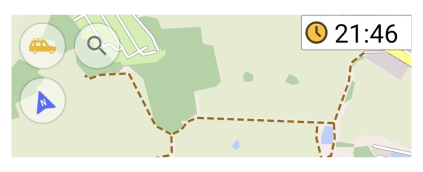
This widget displays the current time taken from your device.
| Enable | Android: Menu → Configure screen → Choose a panel → Add widget → Current time |
| iOS: Menu → Configure screen → Choose a panel → Add widget → Current time | |
| By tapping | No changes |
| Long tap | Opens the Context menu of the widget |
| Format | Device settings configure Time & Format. |
Current Speed
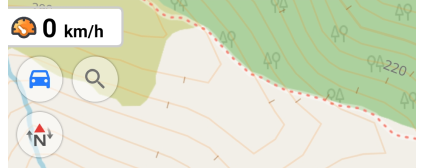
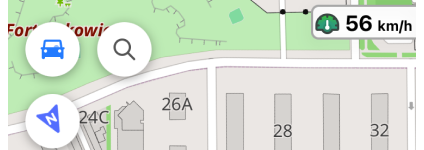
The widget shows the current speed detected by the GPS sensor.
| Enable | Android: Menu → Configure screen → Choose a panel → Add widget → Current speed |
| iOS: Menu → Configure screen → Choose a panel → Add widget → Current speed | |
| By tapping | No changes |
| Long tap | Opens the Context menu of the widget |
| Format | Menu → Configure profile → General settings → Units & formats → Unit of speed |
Average Speed
- Android
- iOS
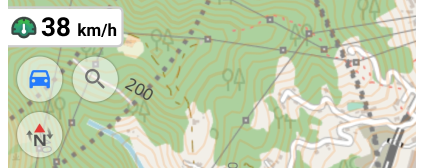
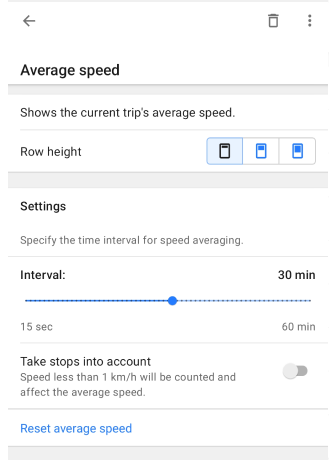
The Average Speed widget calculates and displays your average speed over a selected time interval without requiring navigation or track recording. It is useful for monitoring speed compliance on highways or tracking average speed over the last few minutes of cycling.
-
Configuring the widget.
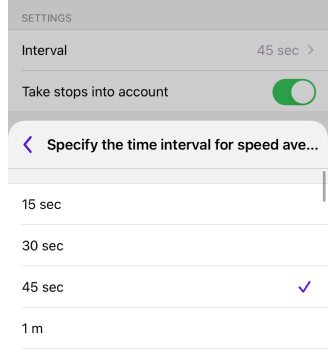
To adjust settings, tap the Settings button (Android) or the widget field (iOS). Available options include: -
Time interval.
-
The average speed is calculated based on the selected time interval, which can range from 15 seconds to 60 minutes.
-
The calculation is based on GPS data using the formula:
Average Speed = AVERAGE(GPS_LOCATION.speed).
-
-
Take stops into account.
Enabled — If the recorded speed is below 1 unit per hour, it is ignored, preventing unnecessary drops in average speed when stopping at traffic lights or taking short breaks.
Disabled — Stops are included in the calculation, meaning long pauses will reduce the overall average speed.
-
Reset average speed. You can reset the average speed calculation in two ways:
- Long tap the widget to open the Context menu, and select Reset average speed.
- Open the widget settings via the Configure Screen menu and select the reset option.
After reset, the average speed is recalculated from the new GPS data. This feature is useful for real-time speed monitoring, such as tracking speed in areas with average speed enforcement cameras.
- Android
- iOS

| Enable | Android: Menu → Configure screen → Choose a panel → Add widget → Average speed |
| iOS: Menu → Configure screen → Choose a panel → Add widget → Average speed | |
| By tapping | No changes |
| Long tap | Opens the Context menu of the widget. Can be used to reset average speed. |
Glide Ratio
- Android
- iOS
| Widgets | Widgets on the screen |
|---|---|
 |  |
| Widgets | Widgets on the screen |
|---|---|
 | 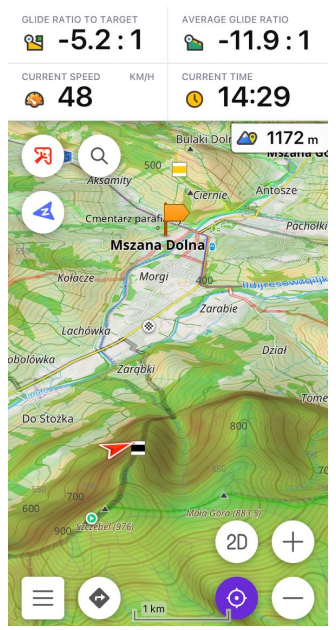 |
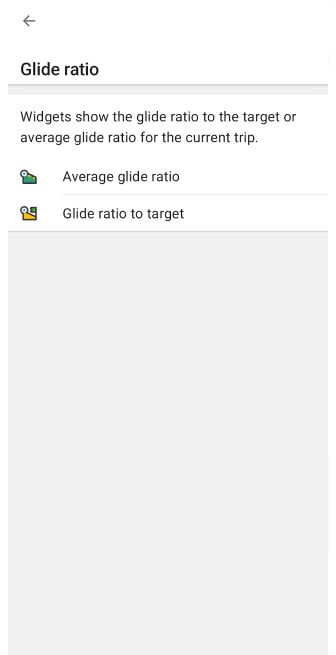
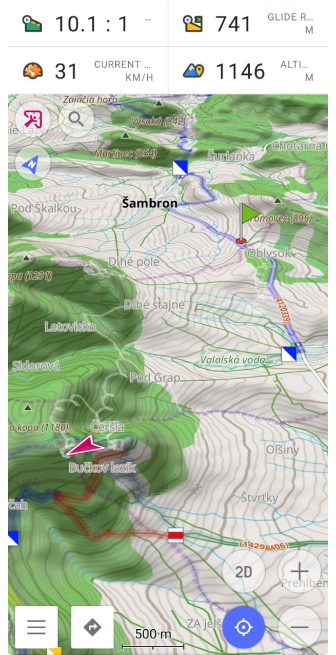
The simple Glide Ratio widgets provides valuable glide ratio information to help make informed decisions when planning air routes. The Glide Ratio widget in OsmAnd helps you evaluate the efficiency of your descent or ascent when navigating to a specific location (marker position on the map). It calculates the glide ratio as the ratio of distance to the difference in altitude between your current position and your intended destination. You can read more about this here.
Widgets use:
- Planning soaring flights. For soaring pilots, the Glide ratio to the target widget becomes an indispensable tool when planning and executing soaring flights. Pilots can estimate how far they can fly to their target given the current conditions and the required glide ratio.
- Optimize climbs and descents. The average glide ratio allows pilots to optimize climbs and descents based on current conditions. Pilots can choose the optimal timing for climbs to maximize flight time, or for descents to reach a target point.
- Reacting to changing conditions. The widget provides continuous glide ratio updates, allowing pilots to react instantly to changes in atmospheric conditions or routes. They can adjust their flight plan to ensure safety and efficiency.
- Maximum use of horizontal distance. Knowing the glide ratio allows pilots to maximize the use of horizontal distance to move to the target, which is especially important when planning long flights.
- Risk reduction. The Glide ratio to the target widget helps pilots avoid situations where reaching the target becomes impossible due to insufficient glide ratio. This helps to reduce risks and improve flight safety.
Positive and Negative Values:
- Positive values indicate that your destination is at a lower altitude than your current position, requiring descent.
- Negative values indicate that your destination is at a higher altitude, necessitating ascent. For example, "-90:1" means that after covering a distance of 90 kilometers, you need to ascend by 1 kilometer to reach your destination.
Rounding/Formatting:
- Value ≤ 0.1:
- "0.05" is displayed as "0".
- Value > 0.1 and < 100:
- for example, "50.7643" is displayed as "50.8:1".
- Value > 100:
- "102.35" is displayed as "102:1."
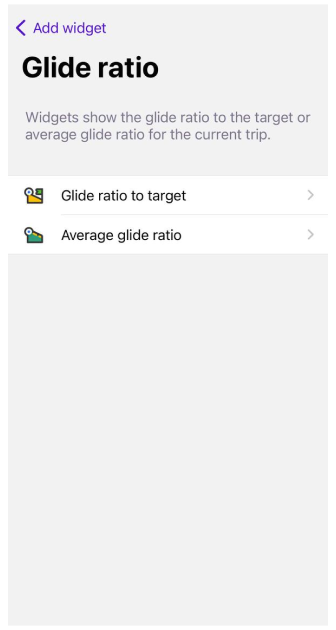
Glide Ratio to Target
- Glide ratio to target shows the exact glide ratio required to reach the target point.
- Target elevation shows the target point elevation. The Map marker should be used as the target point.
| Enable | Android: Menu → Configure screen → Choose a panel → Add widget → Glide ratio |
| iOS: Menu → Configure screen → Choose a panel → Add widget → Glide ratio | |
| By tapping | Changes Glide ratio to target or Target elevation |
| Long tap | Opens the Context menu of the widget |
Average Glide Ratio
- Average glide ratio shows the average glide ratio for a specified time interval.
- Average vertical speed indicates the rate at which an object ascends or descends over a while. Only the first and last points of the time interval are considered for evaluation. You can set the time interval for this widget from 15 seconds to 60 minutes. You should use the Map marker as the target point.
| Enable | Android: Menu → Configure screen → Choose a panel → Add widget → Glide ratio |
| iOS: Menu → Configure screen → Choose a panel → Add widget → Glide ratio | |
| By tapping | Changes Average glide ratio or Average vertical speed |
| Long tap | Opens the Context menu of the widget |
Battery Level
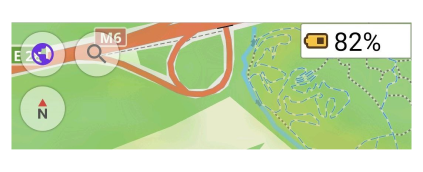
The Battery Level widget displays your device's battery percentage right on the map screen and updates automatically at least once a minute.
-
iOS 17 and later — Due to privacy restrictions, battery level data is only available in 5% increments (e.g., 35%, 60%, or 85%). This is a system limitation imposed by Apple.
-
Android devices — The widget displays the exact battery percentage as reported by the system, without rounding.
| Enable | Android: Menu → Configure screen → Choose a panel → Add widget → Battery level |
| iOS: Menu → Configure screen → Choose a panel → Add widget → Battery level | |
| By tapping | No changes |
| Long tap | Opens the Context menu of the widget |
Coordinates Widget
- Android
- iOS
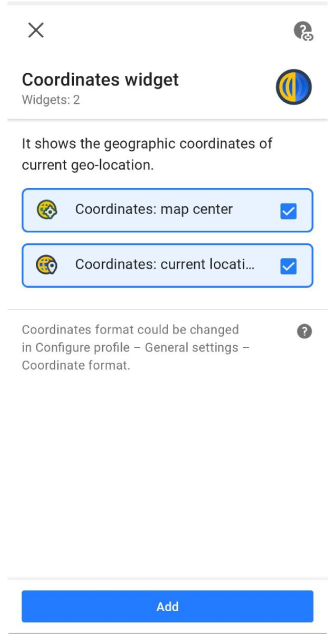
OsmAnd offers two types of coordinate widgets:
- Coordinates: map center - shows the geographic coordinates of the current map center.
- Coordinates: current location - shows the geographic coordinates of current geolocation.
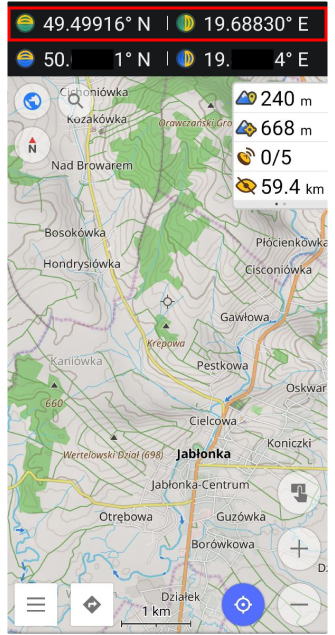
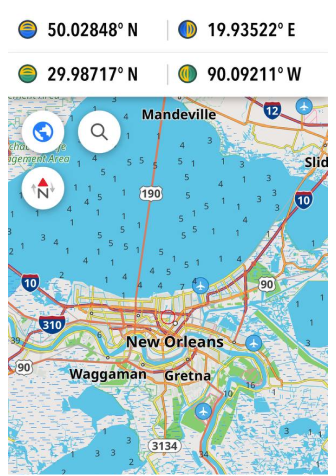
Coordinates widgets are displayed at the top of the screen. Icons with a green background show the latitude and longitude of the point in the center of the visible part of the map, and those with a blue background show the coordinates of your current location. Information about supported Coordinates formats can be found in the Search coordinates article.
| Enable | Android: Menu → Configure screen → Top panel/Bottom panel → Coordinates widget |
| iOS: Menu → Configure screen → Top panel/Bottom panel → Coordinates | |
| By tapping | Copies the coordinates to the clipboard. |
| Format | Menu → Settings → App profiles (iOS) or Configure profile (Android) → General settings → Units & formats → Coordinate format |
GPS Info
This feature is currently not available for the iOS version of the OsmAnd app.
The GPS (Global Positioning System) information widget shows the number of satellites that the device is currently detecting and using. You can use it to check the GPS status in case of a poor signal.
You can reset the current GPS cache through: Menu → Open settings → Browse map → Configure profile → OsmAnd development → A-GPS info.
| Enable | Android: Menu → Configure screen → Choose a panel → Add widget → GPS info |
| By tapping | Opens the GPS status menu with third-party tools to configure the onboard GPS device. |
| Long tap | Opens the Context menu of the widget |
Sun Position
- Android
- iOS
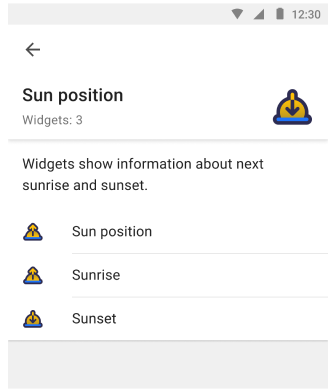
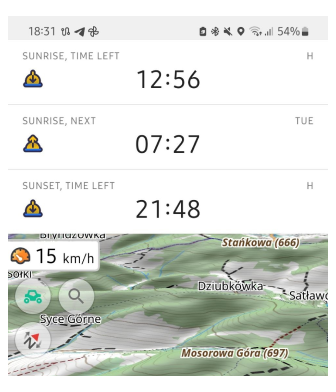
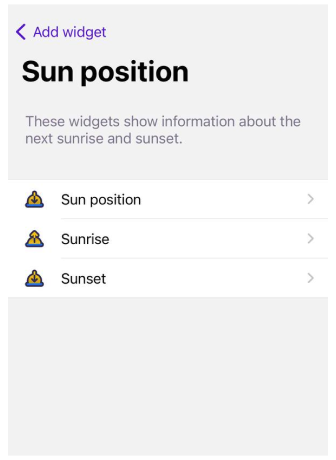
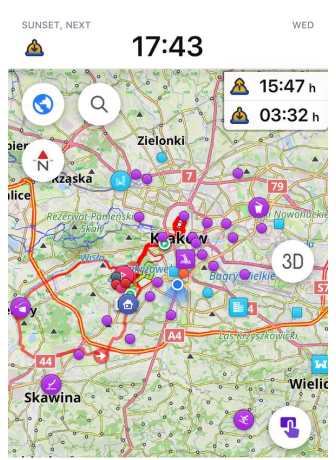
Sun position widgets show the next sunrise and sunset times for the center of the map. When tapped, they display the time remaining until the expected sunset or sunrise. In both cases, the time is based on the configured time of your device.
- Sun position. Shows the time until sunrise or sunset.
- Sunrise. Shows the time of the next sunrise or the time left until sunrise.
- Sunset. Shows the time of the next sunset or the time left until sunset.
| Enable | Android: Menu → Configure screen → Choose a panel → Add widget → Sun position → Sun position, Sunrise, Sunset |
| iOS: Menu → Configure screen → Choose a panel → Add widget → Sun position → Sun position, Sunrise, Sunset | |
| By tapping | Switch between the remaining time and the time of the next sunrise/sunset. |
| Long tap | Opens the Context menu of the widget |
Radius Ruler
You can read a more detailed description here: Radius ruler and Ruler.
- Android
- iOS
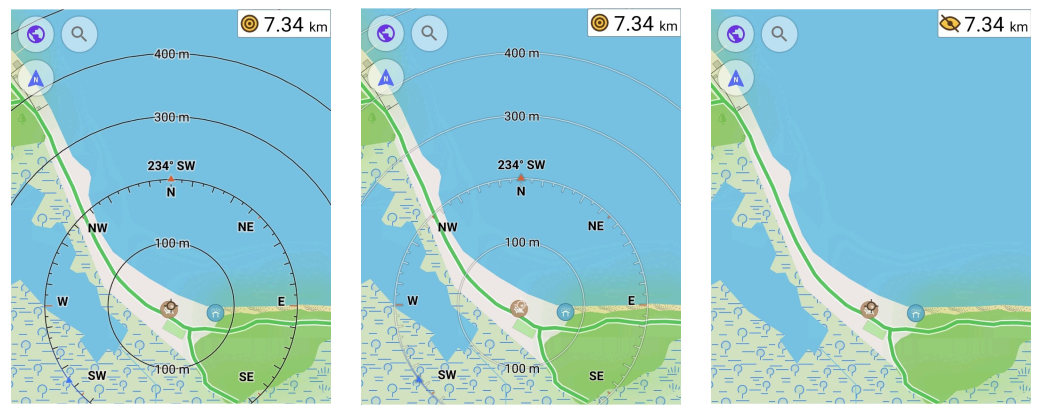
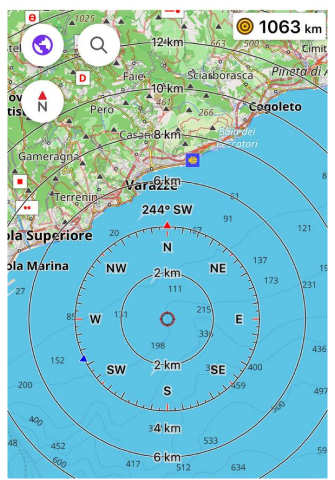 | 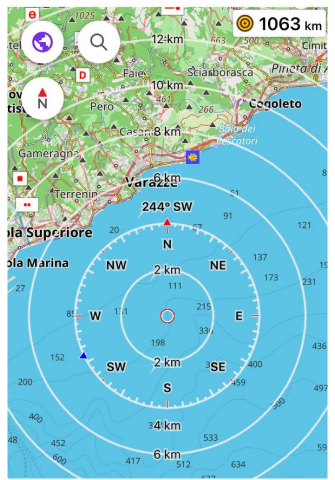 | 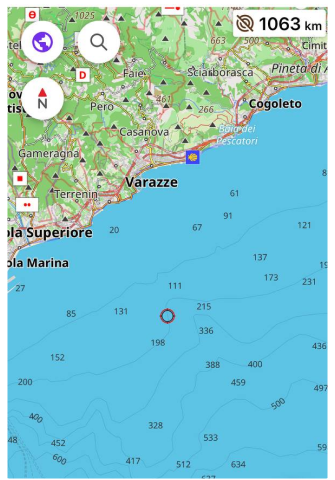 |
The Radius Ruler widget shows the distance between your location and the center point of the Radius Ruler. The radius of the first circle is equal to the map scale.
| Enable | Android: Menu → Configure screen → Choose a panel → Add widget → Radius ruler |
| iOS: Menu → Configure screen → Choose a panel → Add widget → Radius ruler | |
| By tapping | Changes the state of the widget between black scale, grayscale, and invisible modes. |
| Long tap | Opens the Context menu of the widget |
| Format | Menu → Settings → App profiles → General settings → Units & formats → Units of length |
Speedometer
- Android
- iOS
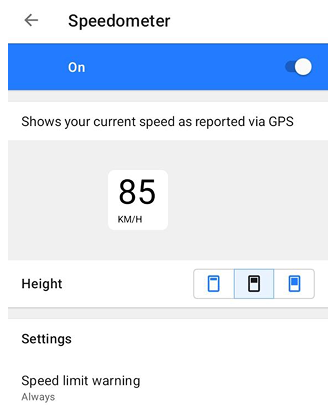

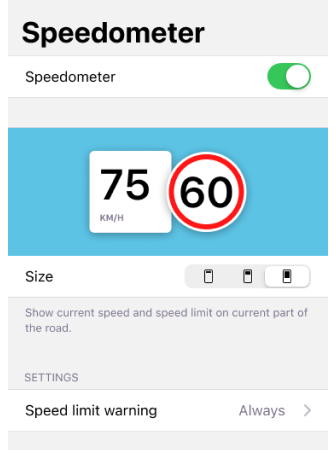
Speedometer widget is a graphical display of the current vehicle speed based on data received from the GPS. It allows you to monitor in real-time the compliance between your speed and the allowable speed limit. The allowable speed limit is provided by OpenStreetMap data for a particular road section and OsmAnd Speed Limit Tolerance setting.
When your current speed approaches the configured Speed limit tolerance, the widget changes its appearance to provide an early warning. When the speed limit is exceeded (taking the tolerance into account), the widget switches to a more prominent “exceeding” indication. The warning/exceeding indication is shown by changing the widget colors (background, speed value, and units). The appearance change may be animated to draw attention when crossing the tolerance or limit threshold.
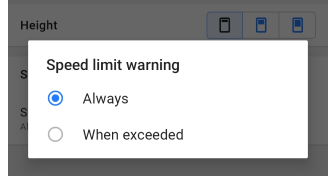
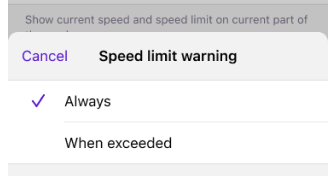
- In the Speedometer settings, you can select the size (Height) of the widget on the application screen as Small, Medium, or Large.
- You can specify when to receive a Speed limit warning, selecting Always or When exceeded. If Speed limit warning is set to Always, the widget can show both the “approaching/tolerance” and “exceeding” indication. If Speed limit warning is set to When exceeded, the indication is shown only after you exceed the speed limit.
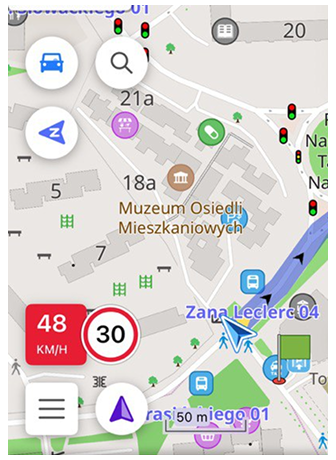
 |  |
| Enable | Android: Menu → Configure screen → Other → Speedometer |
| iOS: Menu → Configure screen → Other → Speedometer | |
| Format | Menu → Settings → App profiles → General settings → Units & formats → Unit of speed |
Plugin Widgets
These widgets are enabled and work in combination with their corresponding plugins.
Trip Recording Widgets
You can read a more detailed description here: Trip recording plugin.
- Android
- iOS
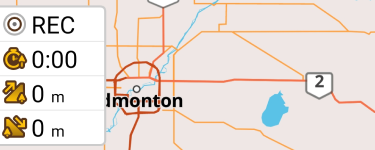
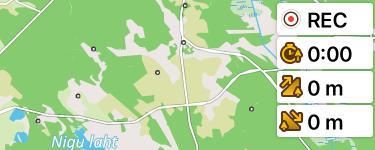
Trip recording widgets refer to Trip recording plugin. You can use widgets to view brief information about the track recording on the screen. Such as Distance, Duration, Uphill, Downhill, Max Speed, and Average Slope.
| Enable | Android: Menu → Configure screen → Choose a panel → Add widget → Trip recording |
| iOS: Menu → Configure screen → Choose a panel → Add widget → Trip recording | |
| By tapping | Starts/Stop track recording or View the graph. |
| Long tap | Opens the Context menu of the widget |
External Sensors Widgets
To add External Sensors widgets to the map screen, enable the OsmAnd External Sensors plugin.
- Android
- iOS
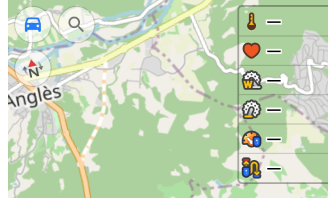
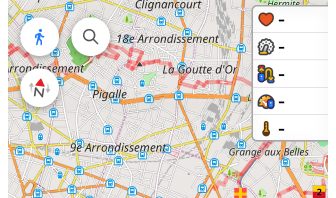
Widgets refer to External sensors plugin. You can use them to view brief information from your external sensors, such as: Heart Rate, Bicycle Power (Android only), Bicycle Cadence, Bicycle Speed, Bicycle Distance and Temperature. You can also select the battery level of connected BLE sensors to be displayed directly in the widget.
-
To add widget — enable OsmAnd External Sensors plugin.
-
To add sensors, select one of the options:
- Go to Menu → Plugins → External Sensors → Settings → Pair new sensor.
- Go to Menu → Configure screen → Choose a panel → Add widget → External Sensors → Choose sensor → Settings → Pair new sensor.
-
Add widgets even if there is no external sensor connected.
-
All added widgets are visible even if no external sensor is connected.
-
Use the Trip recording plugin to record sensor data.
-
Read about how to choose which sensor (of the same type) to show in the widget here.
| Enable | Android: Menu → Configure screen → Choose a panel → Add widget → External sensors |
| iOS: Menu → Configure screen → Choose a panel → Add widget → External Sensors | |
| By tapping | No changes (Android) / Switches the mode between Sensor data and Battery level (iOS). |
| Long tap | Opens the Context menu of the widget |
Vehicle Metrics Widgets
To add Vehicle Metrics Widgets to the map screen, enable the OsmAnd Vehicle Metrics plugin.
- Android
- iOS
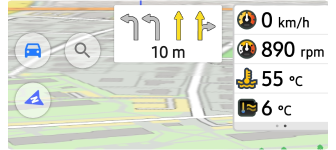
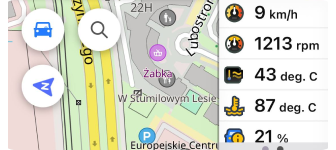
The widgets belong to the Vehicle Metrics plugin. You can use them to view information from a connected OBD-II scanner, such as (14 metrics): Adapter voltage, Ambient Temperature, Battery voltage, Calculated Engine Load, Coolant temperature, Engine Oil Temperature, Engine Runtime, Engine speed (free), Fuel consumption, Fuel pressure, Intake temperature, Remaining fuel, Throttle Position, and Vehicle speed (free).
- To add vehicle metrics widgets to the map screen, enable Vehicle Metrics plugin.
- You can add widgets even if no OBD-II scanner is connected.
- All added widgets are visible whether an OBD-II scanner is connected or not.
- To edit a widget, tap the widget added to the panel, then tap Settings, or directly tap the Settings icon in the widget field.
| Enable | Android: Menu → Configure screen → Choose a panel → Add widget → Vehicle Metrics |
| iOS: Menu → Configure screen → Choose a panel → Add widget → Vehicle Metrics | |
| By tapping | No changes |
| Long tap | Opens the Context menu of the widget |
Weather Widgets
To add Weather widgets to the map screen, enable the OsmAnd Weather plugin.
- Android
- iOS
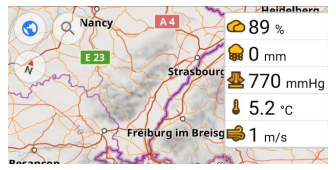
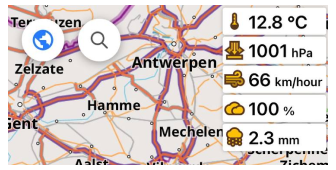
Weather widgets display current weather information for a central point on the map. They are automatically enabled on the screen when viewed with the plugin (Menu → Weather), and you can choose which ones to put on the home screen for everyday use (Menu → Customize Screen). You can read more about this in the article Weather plugin.
- Temperature. Shows the temperature for the current map center.
- Air Pressure. Displays the air pressure for the current map center.
- Wind. Displays the wind speed for the current map center.
- Cloud. Shows the cloud coverage for the current map center.
- Precipitation. Shows the precipitation for the current map center.
| Enable | Android: Menu → Configure screen → Choose a panel → Add widget → Weather |
| iOS: Menu → Configure screen → Choose a panel → Add widget → Weather | |
| By tapping | Shows in a pop-up dialog box the date and time when the weather information is relevant. |
| Long tap | Opens the Context menu of the widget |
| Format | Menu → Plugins → Weather → Settings or Menu → Settings → App Profile → Weather |
Parking Widget
To add Parking widgets to the map screen, enable the OsmAnd Parking position plugin.
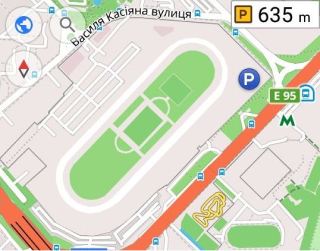
The Parking plugin widget shows the distance from the center of the screen to the parking location. To set a parking spot on the map, zoom in to the required level, then long tap on the place on the map to open the context menu. Follow these settings.
Note: The Parking Widget will only appear if a parking position has been added to the map. Without a saved parking position, the widget will not be visible.
| Enable | Android: Menu → Configure screen → Choose a panel → Add widget → Parking |
| iOS: Menu → Configure screen → Choose a panel → Add widget → Parking spot | |
| By tapping | Moves map view to the parking position. |
| Long tap | Opens the Context menu of the widget |
| Format | Menu → Configure profile → General settings → Units & formats → Units of length |
Mapillary Widget
To add the Mapillary widget to the map screen, enable the OsmAnd Mapillary plugin.
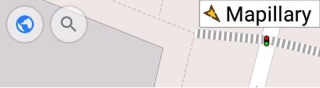
This is a Mapillary plugin widget that provides quick access to the Mapillary application, which enables you to add street-level imagery. The widget is added to the map automatically when the plugin is enabled.
| Enable | Android: Menu → Configure screen → Choose a panel → Add widget → Mapillary |
| iOS: Menu → Configure screen → Choose a panel → Add widget → Mapillary | |
| By tapping | Opens Mapillary application. |
| Long tap | Opens the Context menu of the widget |
Audio/Video Notes Widget
This feature is currently not available for the iOS version of the OsmAnd app.
To add Audio/Video Notes widgets to the map screen, enable the OsmAnd Audio/Video Notes plugin.
These are Audio/video notes plugin widgets that provide quick access to start/stop taking audio, video, or photo notes.
You can configure which action is selected by default:
- On request. Default state. Every time the action selection dialog is displayed.
- Record audio - records an audio note.
- Record video - allows you to record a video.
- Take a photo - allows you to take a photo.
| Enable | Android: Menu → Configure screen → Choose a panel → Add widget → Audio/video notes |
| By tapping | Start / stops taking a note |
| Long tap | Opens the Context menu of the widget |
Tracker Widget
This feature is currently not available for the iOS version of the OsmAnd app.
To add the Tracker widget to the map screen, enable the OsmAnd Tracker plugin.
For the plugin and widget to work, you need to install OsmAnd Online GPS Tracker from Google Play or other sources.
This OsmAnd Tracker plugin widget is used to quickly access the OsmAnd Tracker app and share your location information with other users. The app sends Live Location messages to selected chats within a certain time, displays a list of contacts and groups, and checks chats for messages with your location, which are then displayed on a map in OsmAnd.
![]()
| Enable | Android: Menu → Configure screen → Choose a panel → Add widget → OsmAnd tracker |
| By tapping | Opens OsmAnd Online GPS Tracker app. |
Developer Widgets
To add Developer widgets to the map screen, enable the OsmAnd OsmAnd development plugin.
Developer widgets provide information about map rendering speed and virtual camera position parameters, including zoom level, distance to map center, camera elevation and tilt angle.
Map Rendering FPS
- Android
- iOS
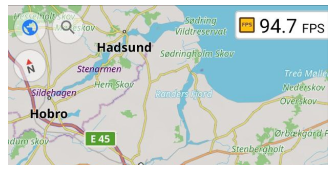
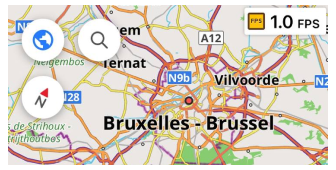
The Map rendering FPS widget displays the rendering speed of the map and its elements, measured in frames per second (FPS). A higher FPS value indicates faster rendering and smoother visual performance.
| Enable | Android: Menu → Configure screen → Choose a panel → Add widget → Map rendering FPS |
| iOS: Menu → Configure screen → Choose a panel → Add widget → Developer widgets → Map rendering FPS | |
| By tapping | No changes |
| Long tap | Opens the Context menu of the widget |
Camera Widgets
- Android
- iOS
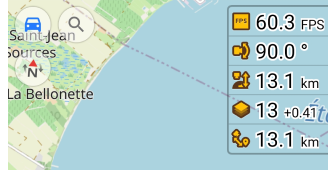

The Camera widgets allow you to monitor the alignment between the OsmAnd map and the earth's surface.
- Camera tilt. Displays the camera's tilt angle in perspective mode. The default value is 90° (no tilt).
- Camera Elevation. Indicates the camera's elevation above the surface level.
- Zoom level. Shows the current map zoom level.
- Distance from camera to target. Measures the distance between the camera and the target location on the map.
| Enable | Android: Menu → Configure screen → Choose a panel → Add widget → Developer widgets |
| iOS: Menu → Configure screen → Choose a panel → Add widget → Developer widgets | |
| By tapping | Switch between modes (Zoom Level) / No changes (Others) |
| Long tap | Opens the Context menu of the widget |
Memory Info
This feature is currently not available for the iOS version of the OsmAnd app.

The Memory info widget is a developer tool for monitoring how OsmAnd uses device memory. It provides information about different types of memory used by the application.
Available modes:
- Used Java Heap — Displays the amount of Java heap memory currently used by objects in the application.
- Allocated Java Heap — Shows the amount of memory that the Java Virtual Machine (JVM) has currently allocated for the application.
- Max Java Heap Limit — Indicates the maximum Java heap size allowed for the application by the Android system.
- Native Heap Allocated — Displays the amount of memory allocated through native code (C/C++), including system libraries and NDK components.
- Graphics Memory — Shows the amount of memory used for graphics resources such as OpenGL textures and buffers.
NOTE: Memory values may fluctuate depending on system processes, background applications, and the current activity within OsmAnd. These values are dynamic and intended primarily for debugging and performance monitoring.
| Enable | Android: Menu → Configure screen → Choose a panel → Add widget → Developer widgets → Memory info |
| By tapping | No changes |
| Long tap | Opens the Context menu of the widget |