Tracks and Routes
This article is incomplete & needs to be reviewed. You can help by creating a pull request.
Overview
OsmAnd has many powerful features to display various routes on the map. Routes could be built as part of Navigation, created via Plan Route, imported as GPX tracks, recorded via Trip Recording plugin or browsed and selected from OpenStreetMap data.
Type of routes on the map
OsmAnd can display several different type of routes:
- Tracks (GPX) - recorded or planned trip saved in GPX-format. This kind of route could be imported from the external source, created in the application or recorded by user. GPX could contain one of 3 different types of data or all of them:
- Track as a line - file has
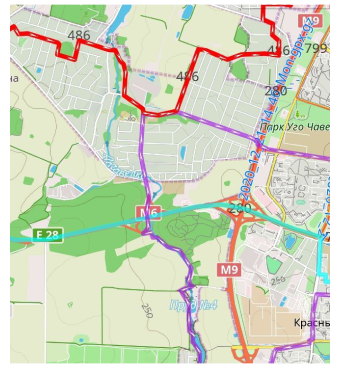
<trkpt>points array, each point has location and optionally time, speed, altitude and other attributes. These tracks are displayed on the map as solid lines. - Track as a route - file has
<rtept>points array, each point described as an intermediate point of the route. It depends on how points within a route should be connected either as small route segments or via straight line. These tracks are displayed on the map as dashed lines. - Waypoints - file has
<wpt>points with attributes. Waypoints are displayed as circular points on the map. You could click on them to get additional information.
- Track as a line - file has
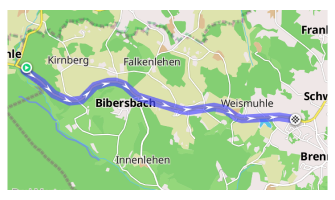
- Navigation Route - a route line displayed during navigation. By default this is a solid transparent blue line, though default appearance depends on vector map style, day & night mode. It's also possible to fully customize it on Android.
- Routes and route networks on the map - special objects on the map from OpenStreetMap data and provided with standard vector maps. They typically represent popular local routes and could be displayed in many ways (shields, color, thickness, pattern). To use these types of routes you will need to enable them on the map.
Read more about GPX Tracks. GPX Tracks.
Tracks
OsmAnd provides the ability to record and display tracks. This allows you to get location, movement, distance, altitude and travel time data and analyze track data.
Display tracks on the map
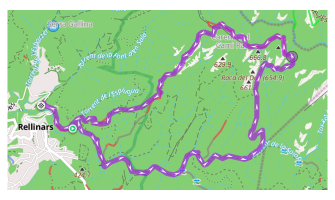
OsmAnd allows you to view tracks on a map. Each point on the track corresponds to a specific location and contains information about time, speed and altitude. This allows you to visually assess the route, learn about the places you have visited and estimate the difficulty of the route by changes in altitude.
You can choose which tracks to show on the map and which to hide. You can do this in the My Places menu, the Configure map menu, and in the Track Context menu when saving a track in the Plan a route tool, or with Route Details.
Tracks in Configure map menu
- Android
- iOS
Menu → Configure map → Show → Tracks
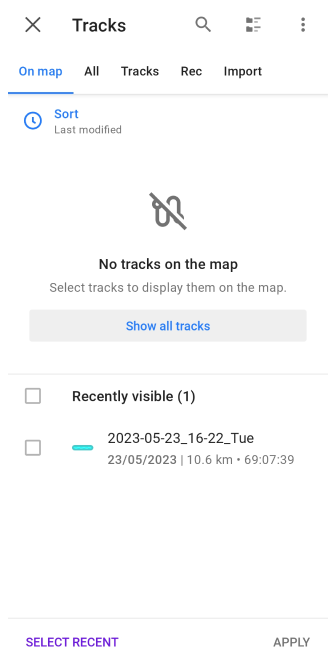
Menu → Configure map → Tracks
You can read additional information in the Tracks article.
Tracks in My Places menu
- Android
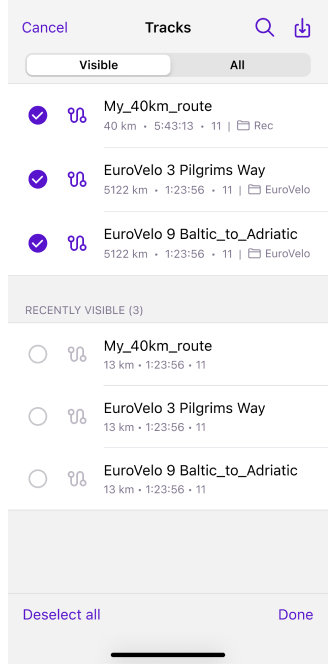
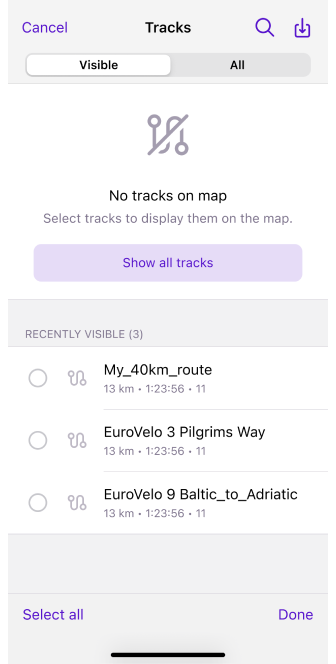
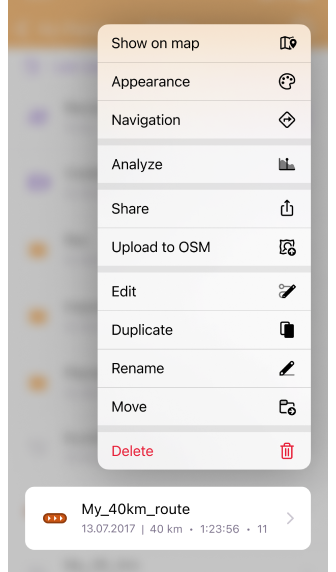
- iOS
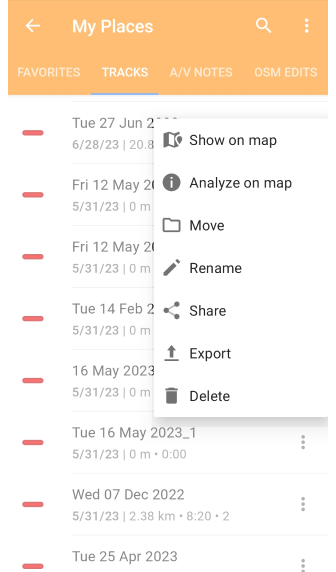
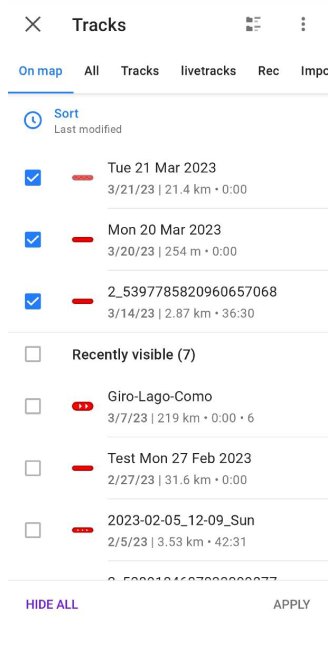
To show track on the map, you need to:
- Android - tap the three-dot menu in the field with the required track.
- iOS - long-tap the required track in the list.
Tracks in Track Context menu
- Android
- iOS
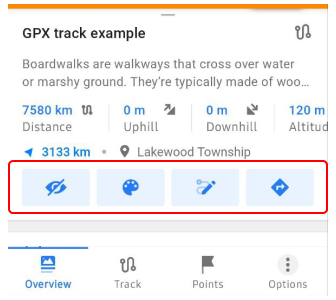
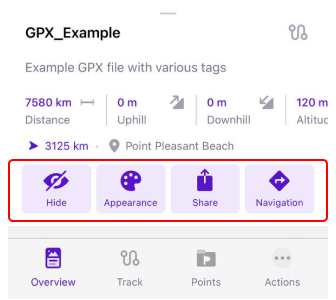
Show / hide buttons allow to anable or disable displaying of a track on the map.
Track Appearance
 Some parameters you can use only with Maps+ or Pro feature: free and paid features.
In the OsmAnd application, you can apply some settings by changing the appearance of the tracks, to better identify them on the map.
There are three ways to access the Track Appearance menu:
- Go to the My Places menu and tap any available track in the list (Menu → My Places → Tracks), select the Appearance icon in the Track Context menu in the Overview section.
- Tap the needed track on the map and select the Appearance icon in the Overview section.
- Select Appearance from the track recording context menu.
- Go to Menu → Configure map → Tracks → ⋮ → Change appearance for the tracks you have selected to be displayed on the map.
Split interval
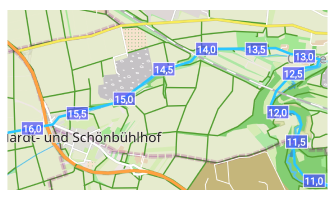
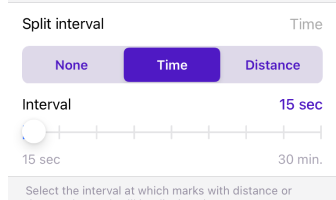
select the interval at which distance or time stamps are displayed on the track.
Direction arrows
select the interval at which distance or time stamps are displayed on the track.
Show start and finish icons
![]()
allows you to select whether or not to show the start and end icons of track segments.
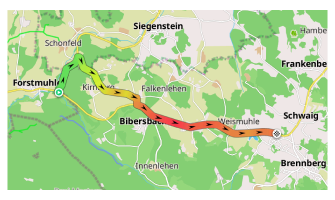
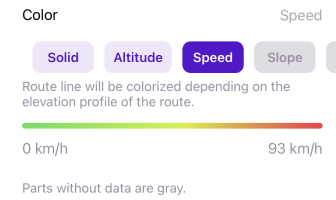
Color
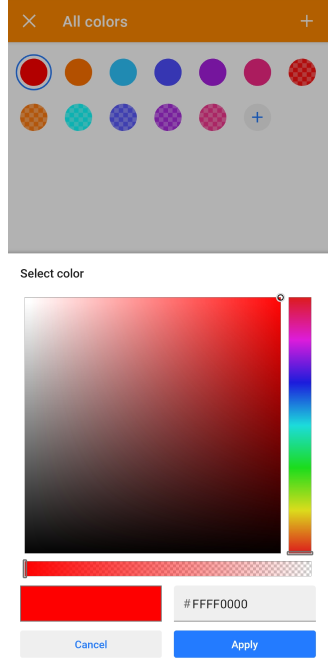
allows to display the track line in any color and transparency, or select coloring according to the map legend. If necessary data on the track sections are missing, such sections are displayed in gray color.
Color: Solid, Speed and Altitude are free color settings. If Speed and Altitude are not active, it means that the track does not contain this data.
Color: (Maps+ / Pro feature) Slope, Road type, Surface, Smoothness, Winter and ice roads, Surface, Difficulty of horse trails are paid color settings. A detailed description of these settings can be found in the Map screen during navigation page, specifically in the Route line appearance section.
Width

You can customize the appearance of the track in several menus of the application:
- Track → Appearance.
- Navigation settings → Customize route line.
- My Places → Tracks tab → any folder → Default appearance.
With the Width setting you can choose the thickness of the track line based on the width of the road or intersection with other tracks, or for example, if you want to highlight a track on the map by importance.
- Thin, Medium, and Bold are lines whose width is fixed and preset by the OsmAnd application.
- In the Custom setting you can set the required line width with a slider, from 1 to 24.
- In the Tracks tab with the Original setting, different original width parameters can be retained for each track of the selected folder.
- In the Configure Profile the route line can be set to the Map Style width, this is the default width for map specified by the OsmAnd application.
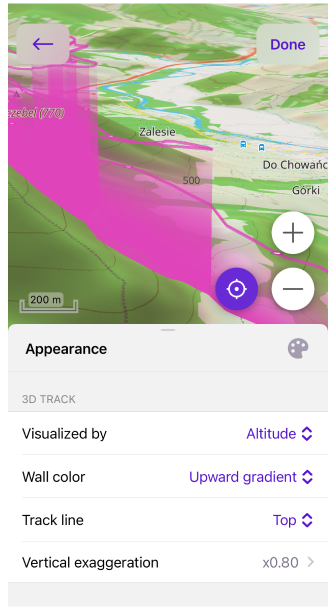
3D Track
- Android
- iOS
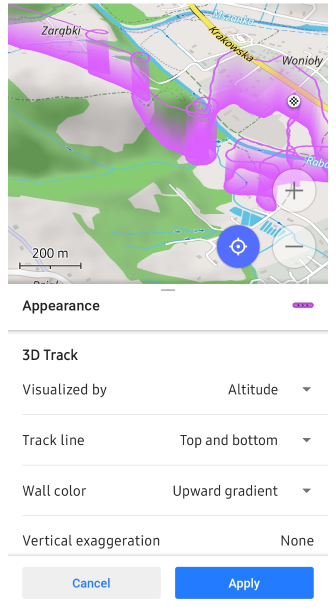
This Paid feature allows you to display tracks by elevation.
You have the option to use 3D track visualization if the map rendering engine Version 2 (OpenGl) is enabled.
This Paid feature allows you to display tracks by elevation.
3D track's settings:
- Visualized by: None , Altitude, Speed, Fixed height (for Android additional: Heart Rate, Bicycle Cadence, Bicycle Power, Temperature, Bicycle Speed) - Choose to display the 3D track by altitude (altitude data from GPX track file), at a fixed height, or not at all.
- Wall color: None, Solid, Downward gradient, Upward gradient (for Android additional: Altitude, Slope, Speed) - Select whether to color the 3D track and choose the type of coloration.
- Track line: Top, Bottom, Top and bottom - Decide where to add a line to the 3D track for better visibility.
- Vertical exaggeration : None to x3.0 - Adjust the level of vertical exaggeration for the 3D track.
- Wall height (if you choose Visualized by → Fixed height) : None to 2000 m - by changing the scale value, you can change 3D track height.
Join gaps
the gaps between segments will be connected.
Reset to original
resets all settings to default values.
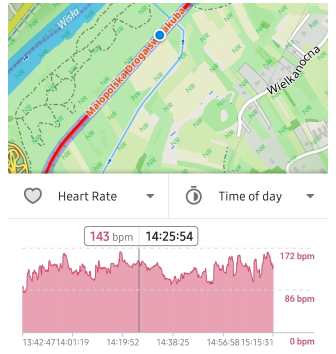
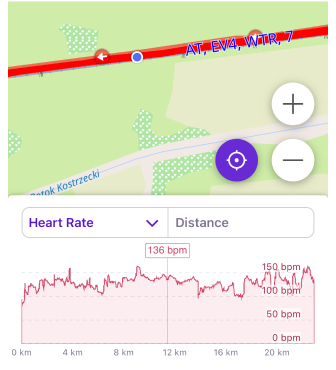
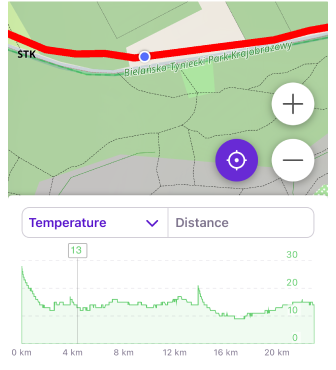
Analyze Track on Map
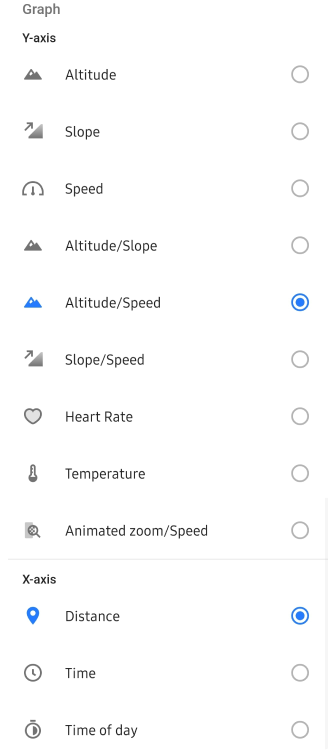
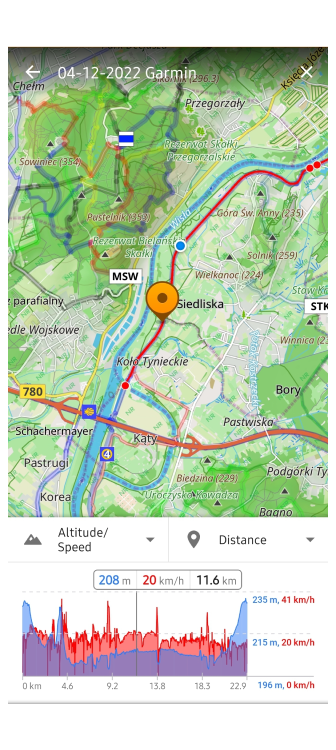
This tool allows you to view track information using graphs and maps.
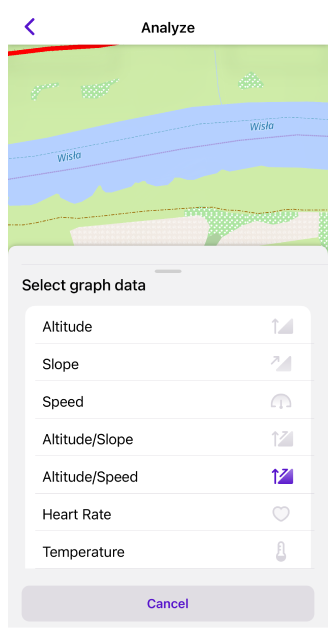
- Graph data (Y-axis): Altitude, Slope, Speed, External sensors data, or a combination of the two (if data is available on the track).
- Graph dimension (X-axis): Distance, Time, Time of day.
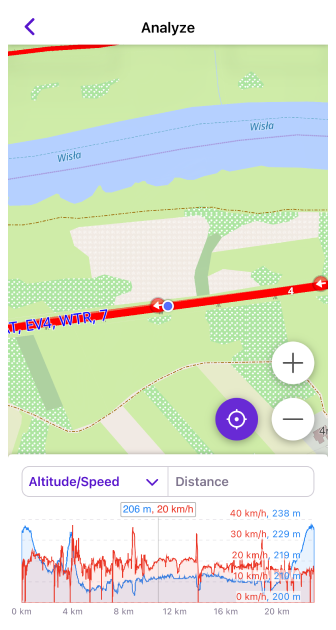
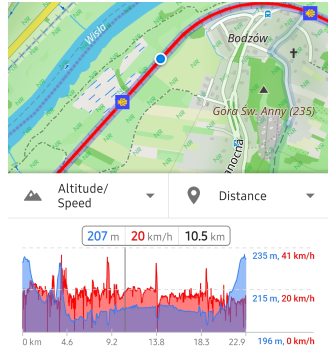
- Tap/Slide. Tap the Graph to display information about the track point and moving it along the Graph highlights the location of the point on the map and displays information about it in the bar.
- Scale. Scale the Graph with a two-fingers gesture.
- Follow My location. Tap the My Location buttonto have the map view and graph synchronized with your location. In this case, graph scale will remain the same and the bar information will be fixed to 1/4 to the left. As you move, the graph will slide from left to right, displaying information ahead of your track. This feature is useful for hiking and cycling while navigating, although no other widgets are displayed on this screen.
- Android
- iOS
Navigation Route
Navigation route is a solid line prepared by Route Preparation process. It is displayed during Navigation or during Route preparation step.
Routes on the map
- Android
- iOS
Menu → Configure map → Map rendering → Routes
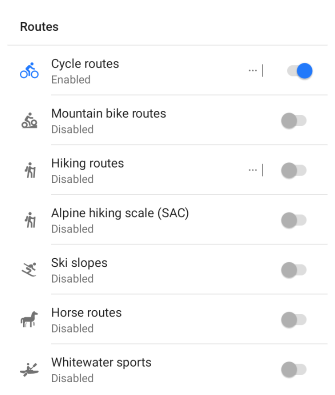
Menu → Configure map → Routes
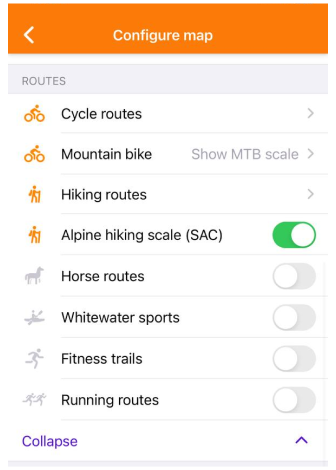
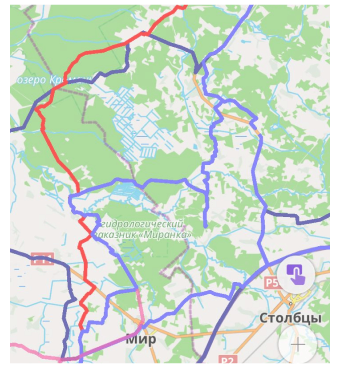
- To display the required routes on the map, enable them in the Routes list of the Configure Map menu.
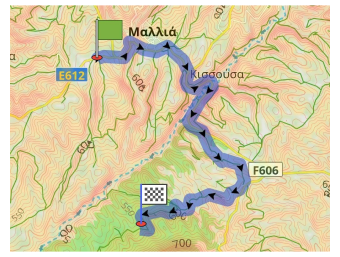
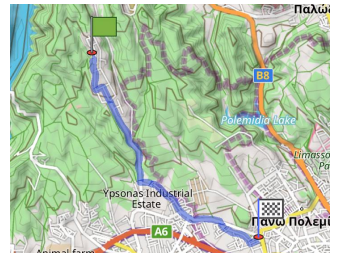
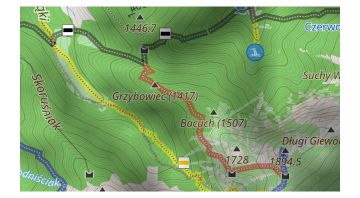
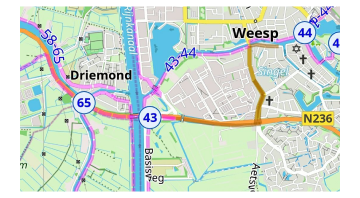
- OsmAnd can highlight routes present on OpenStreetMap. They can be selected by tapping the symbol on the route, and if the visible set of routes is configured correctly, you can follow the color and icons.
- You can create a track on top of the routes using the Plan a Route tool.
Save as a Track
- Android
- iOS
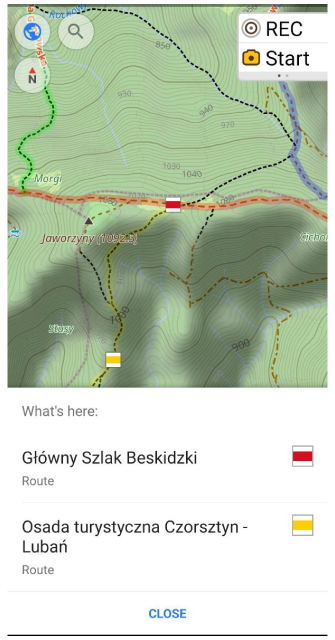

Hiking, Cycle, Travel, and other routes are available for selection on the map, and marked with OSMC symbols. If you tap a route symbol, a list of the routes nearest to it is offered. Selecting one of them opens the Track context menu of the route.
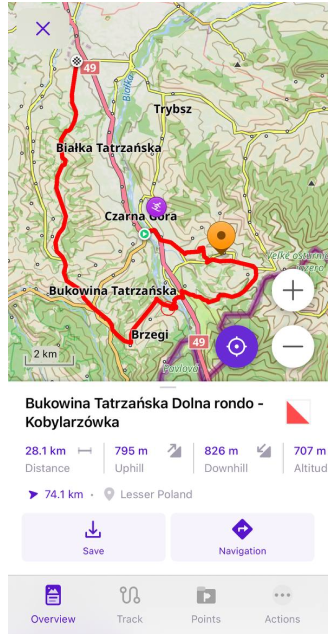
To save the route as a GPX file, tap the Save (Download) button under Info panel. This will open the Quick actions button panel where you will have access to track actions such as changing Appearance, Navigation, or editing Plan a route.
Route info
- Android
- iOS

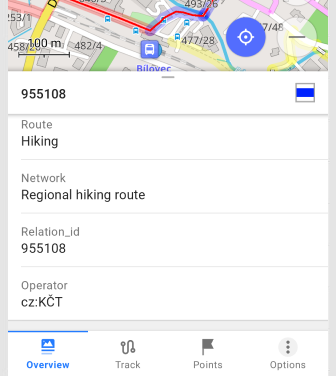
- To get full route information, tap the route symbol.
- If you have already used the download button in the Track context menu, tap the line of the required route on the map.
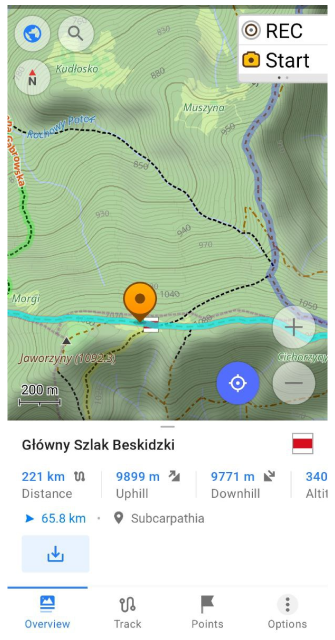
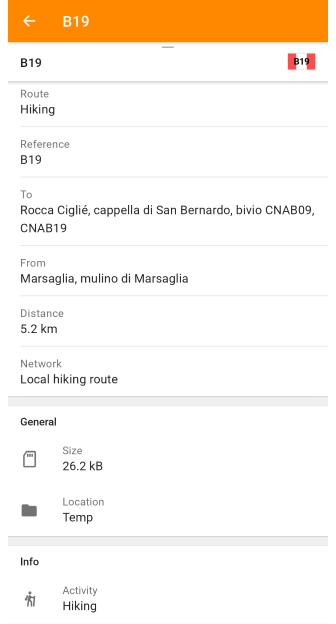
Route info in Overview tab allows you to view detailed information about the selected route such as:
- Track details: Route name/OSM ID, Type, Description, Distance, Direction, Ascent/Descent, Altitude range, Network, Operator, State, Color, Roundtrip, Start/End points, and more.
- General: Size, Location, Created on.
- Additional Info: Type of activity.
Related OSM ID
- Android
- iOS
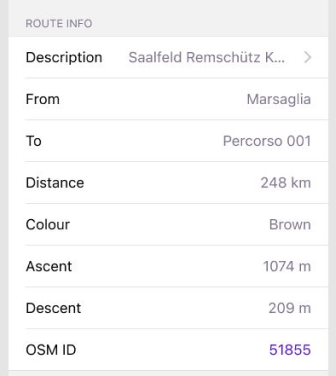
A route may not have a name and reference, or the information may have been lost, in which case the corresponding OSM ID is displayed in the Track Context Menu and Route info. It is only visible if the OpenStreetMap plugin is enabled, it is not displayed as a name on the map, and tap the ID in Route info opens the related OSM ID (for example, 51855).
Graph
In Tracks tab, Graph displays track information in graphical form with a description of the details:
- Overview. Distanse, Time.
- Altitude and Slope information.
- Provides access to Analyze on map feature
- Option menu. Edit, Delete, Split interval.