OsmAnd 3.8 (Android)

For our team a release day, it's like a progress report to the users. Every day we are working on app improvements to make OsmAnd more user friendly. We fix mistakes, that can also occur due to massive changes that have turned basic maps into a universal tool for travellers for over 10 years. But still, it is not perfect yet. We are not only grateful for all the positive reviews, but also thankful for the constructive criticism and your dream of a better OsmAnd.
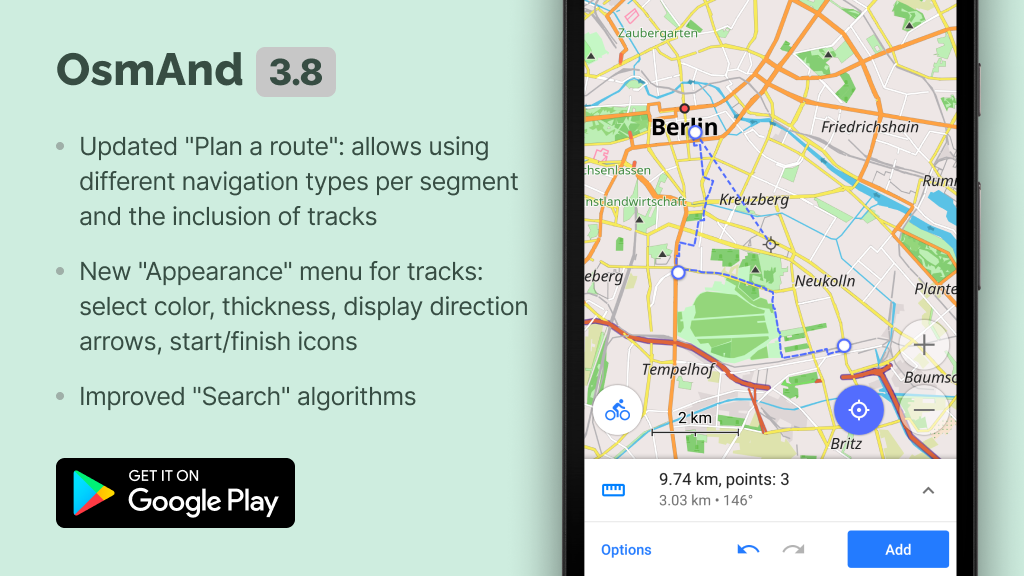
Updated "Plan Route" mode
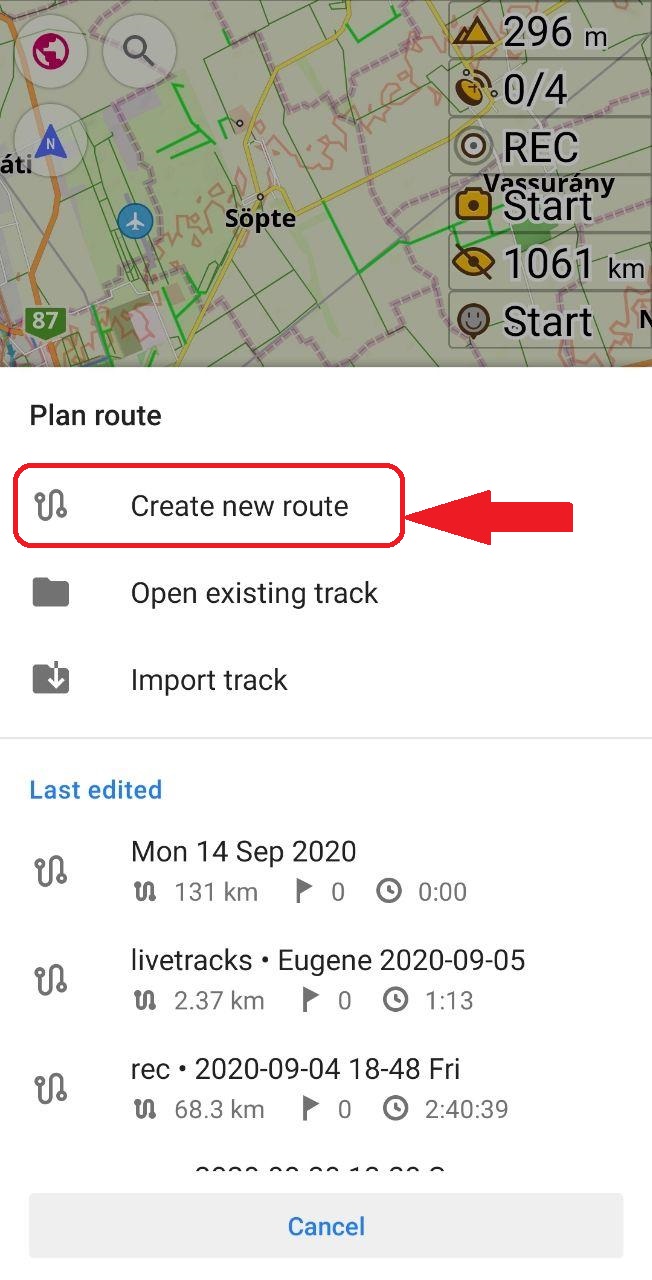
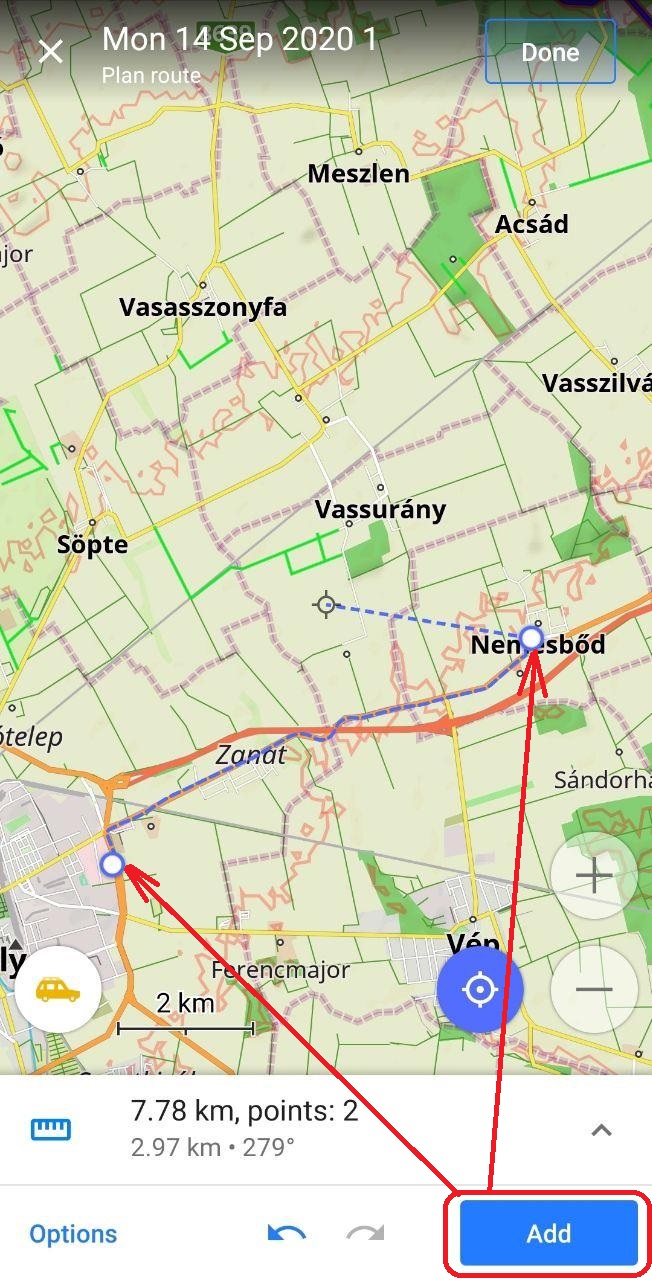
We renamed the "Measure distance" tool to "Plan a route". The updated "Plan a route" mode allows using different navigation types for each segment and attaches any track to the roads. What does it mean? E.g. you want to have a route for your Enduro trip. The first part of your trip is a road from your home to the offroad part, the second part is an unpaved road, and the third part is a road returning home. Go to General menu → Plan a route. Choose "Create new route", next click the Profile icon and choose Road Profile for the first part of our trip. After that, we add starting and ending points. The first segment is built.
 |  |  |  |
|---|
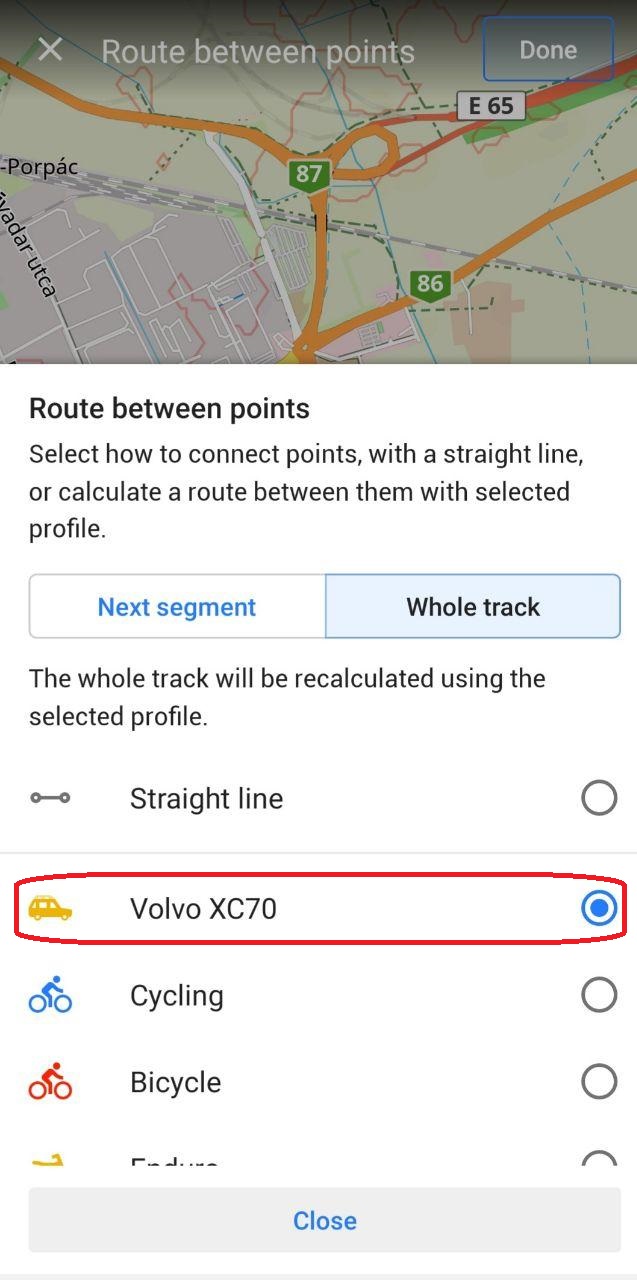
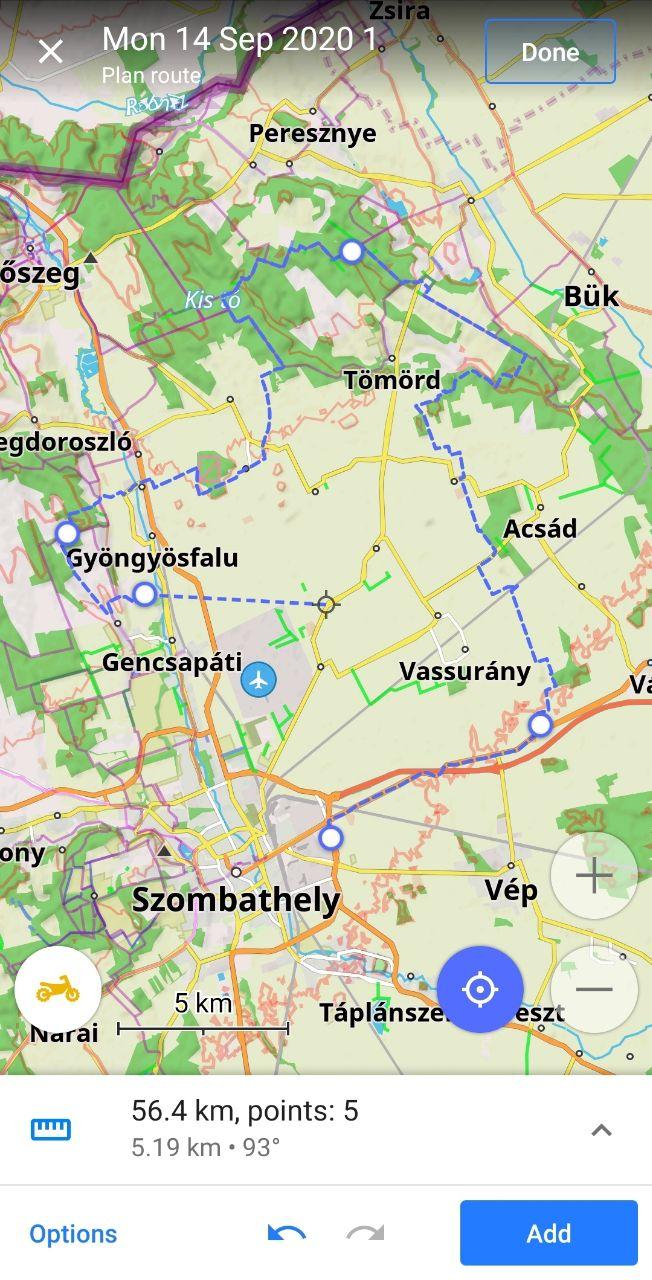
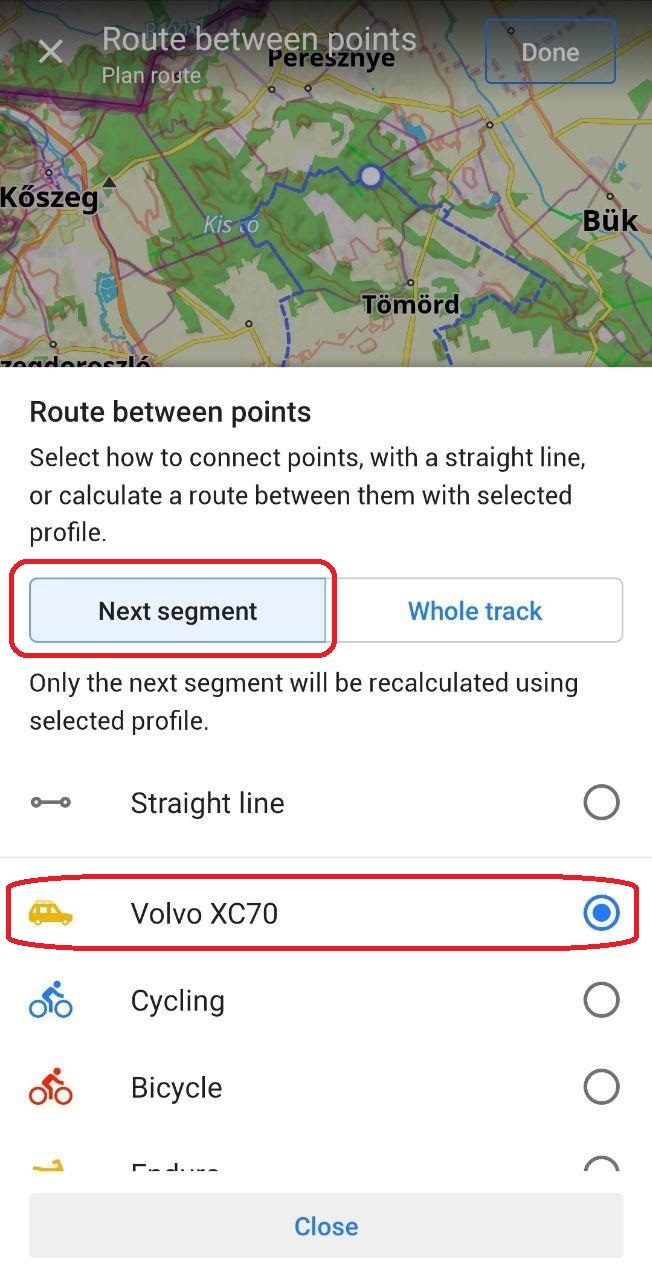
For the second part of our trip, we click the Profile icon and choose our Enduro navigation profile (Prefer unpaved roads) and "Next segment" (Only the next segment will be recalculated using a chosen profile). After that we choose points for our offroad trip.
 |  |
|---|
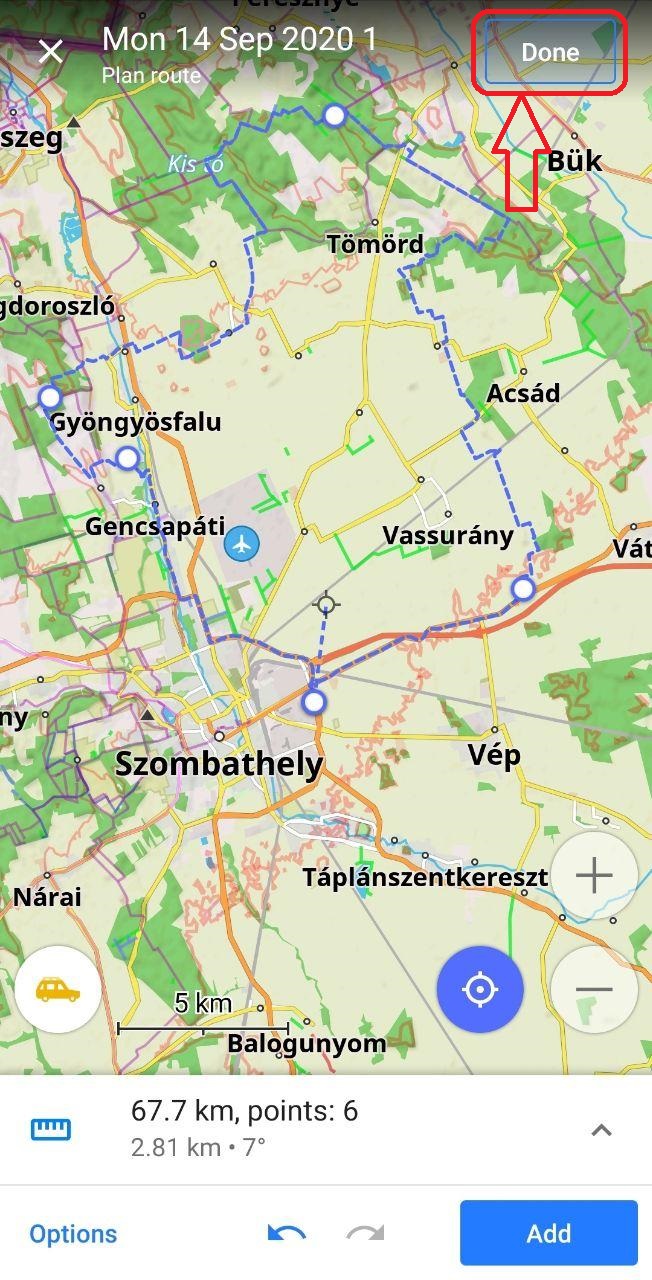
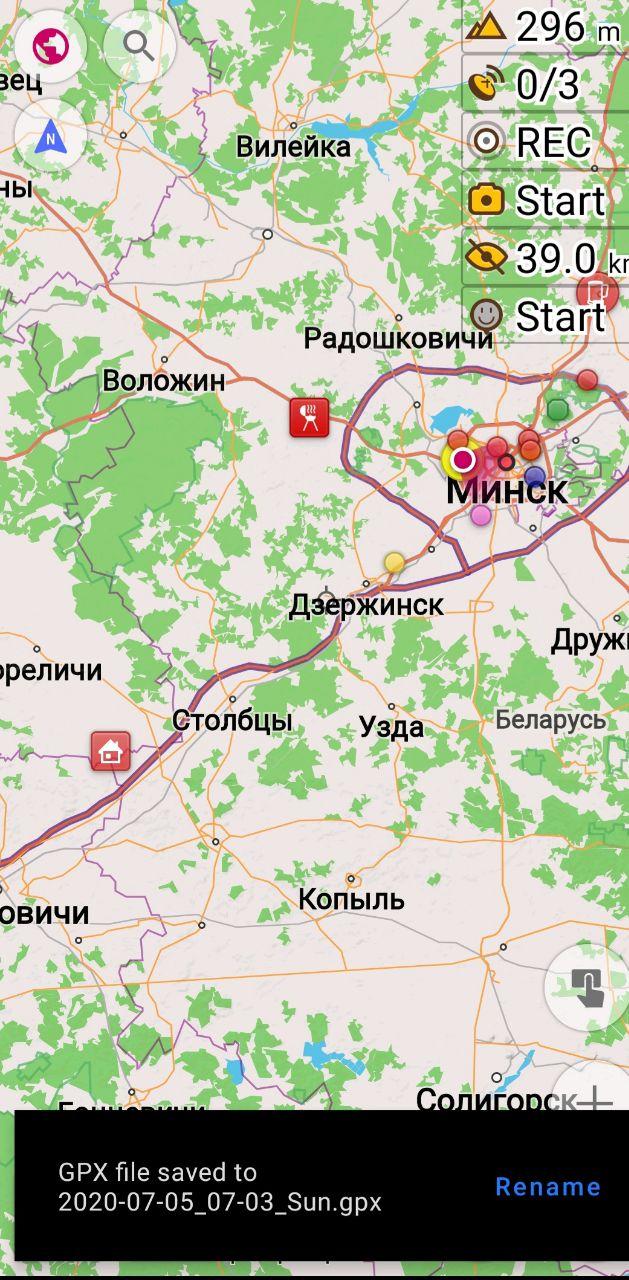
For the last part (going back home) we choose Road profile and add the end point of our trip. Click the "Done" button and save (and rename) our GPX file with the journey trip.
 |  |  |
|---|
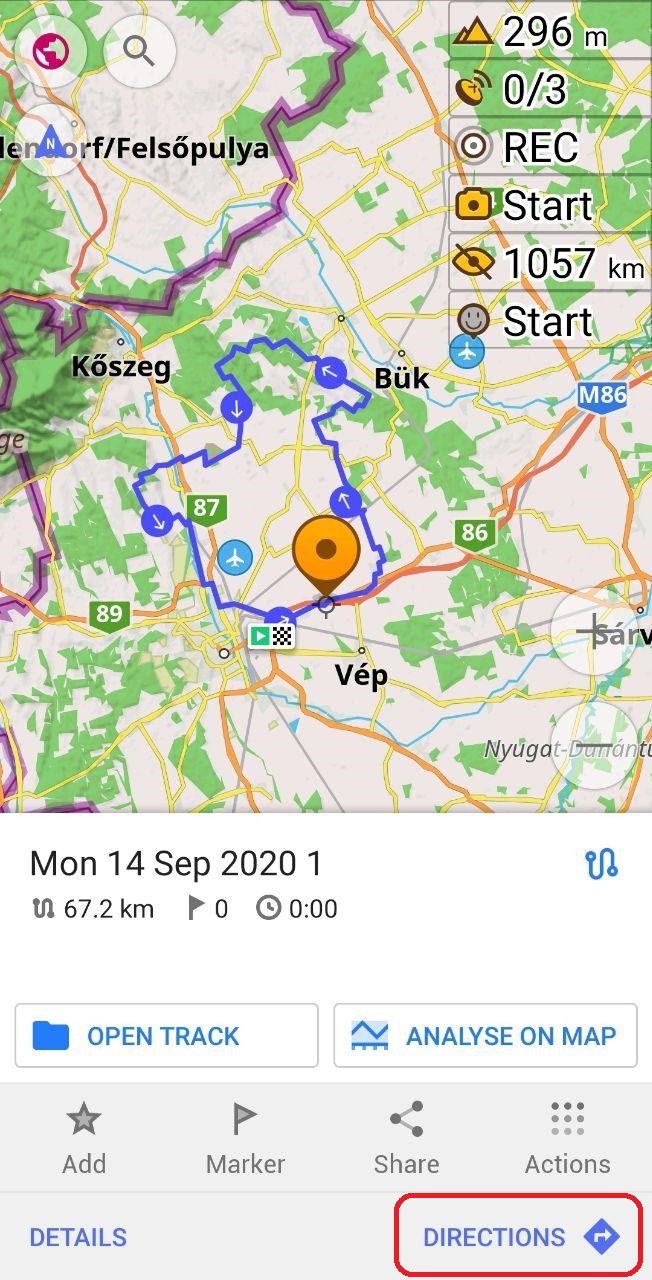
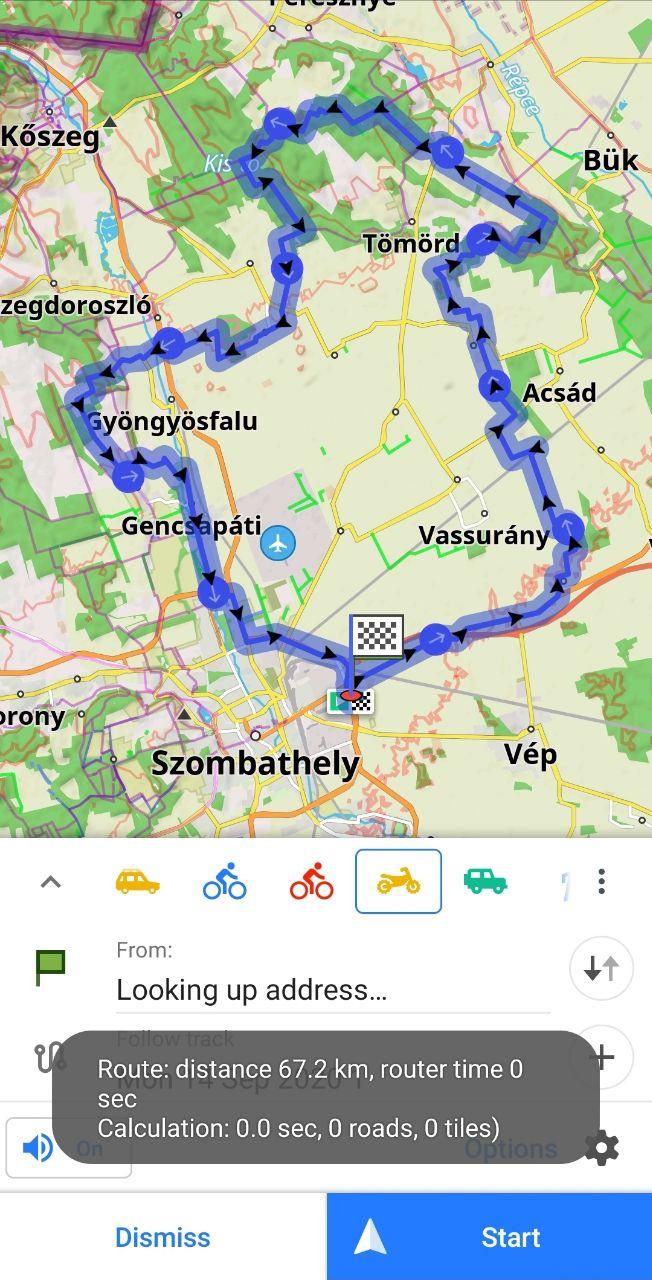
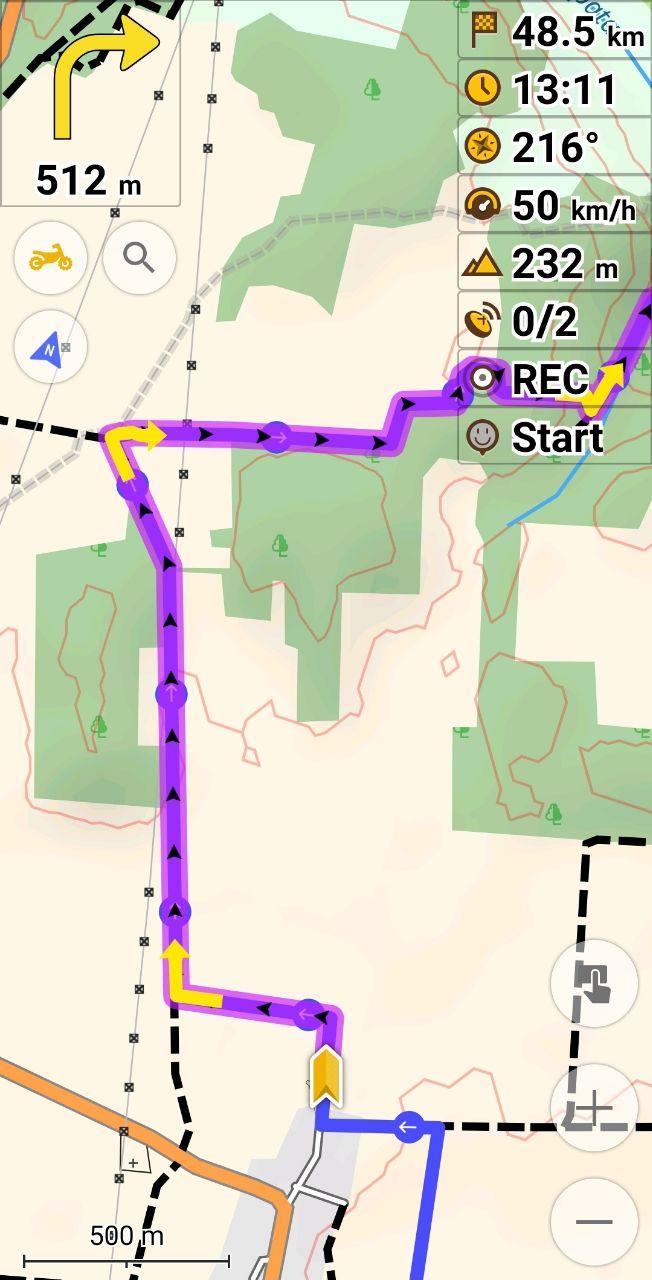
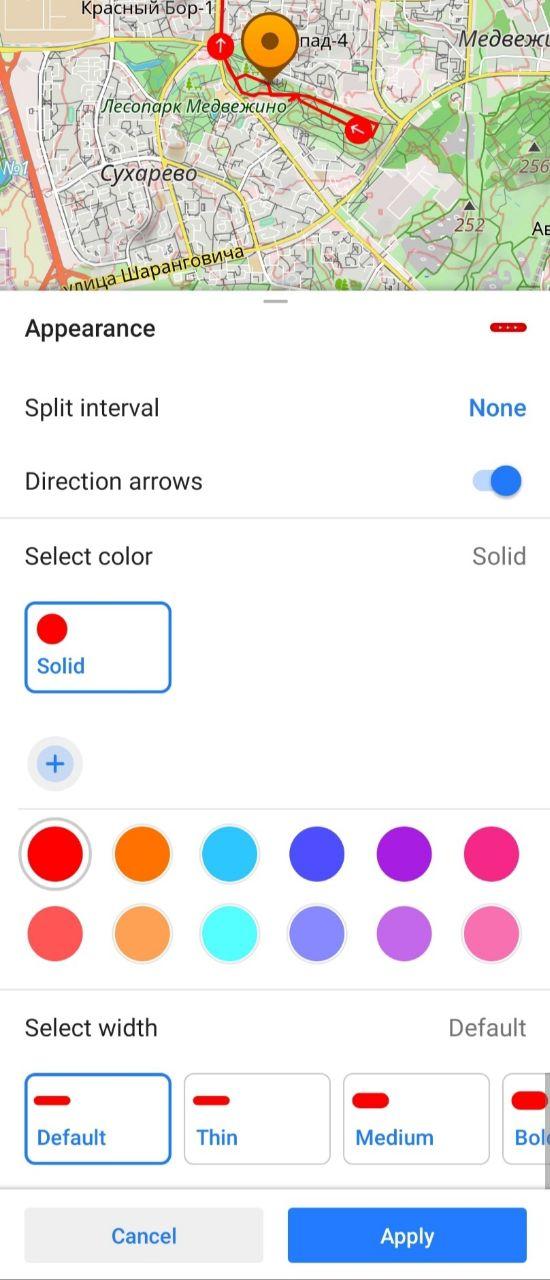
Now, we click on our track, then change Appearance of the track. Click the "Directions" button, and start our trip using the GPX track which we built in the "Plan a route" tool.
 |  |  |  |
|---|
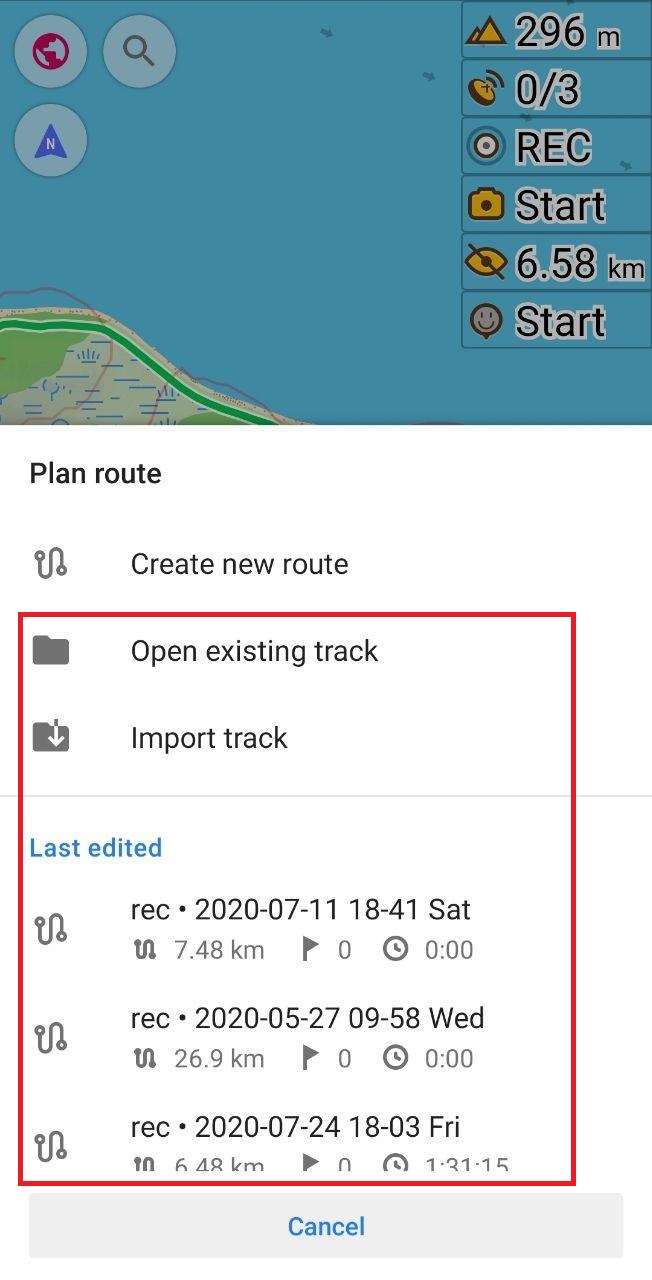
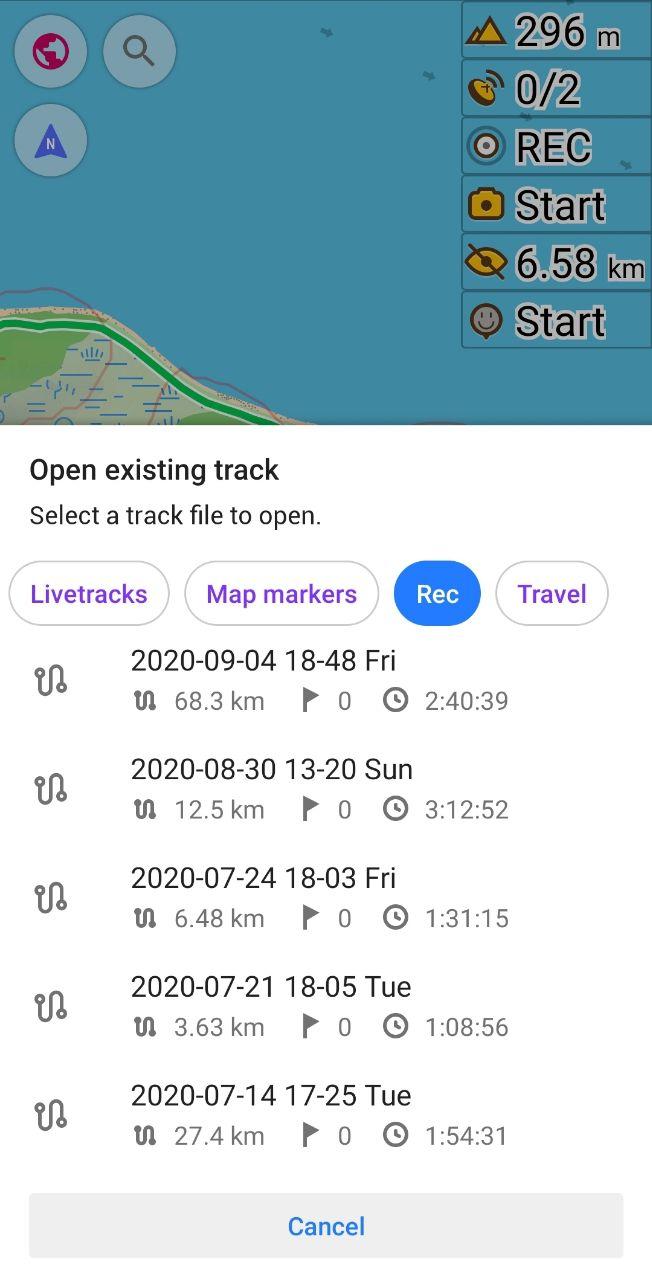
Next, you can open an existing track, import track, or open the last edited track. When you click on "Open existing track" you can select a track file to open.
 |  |
|---|
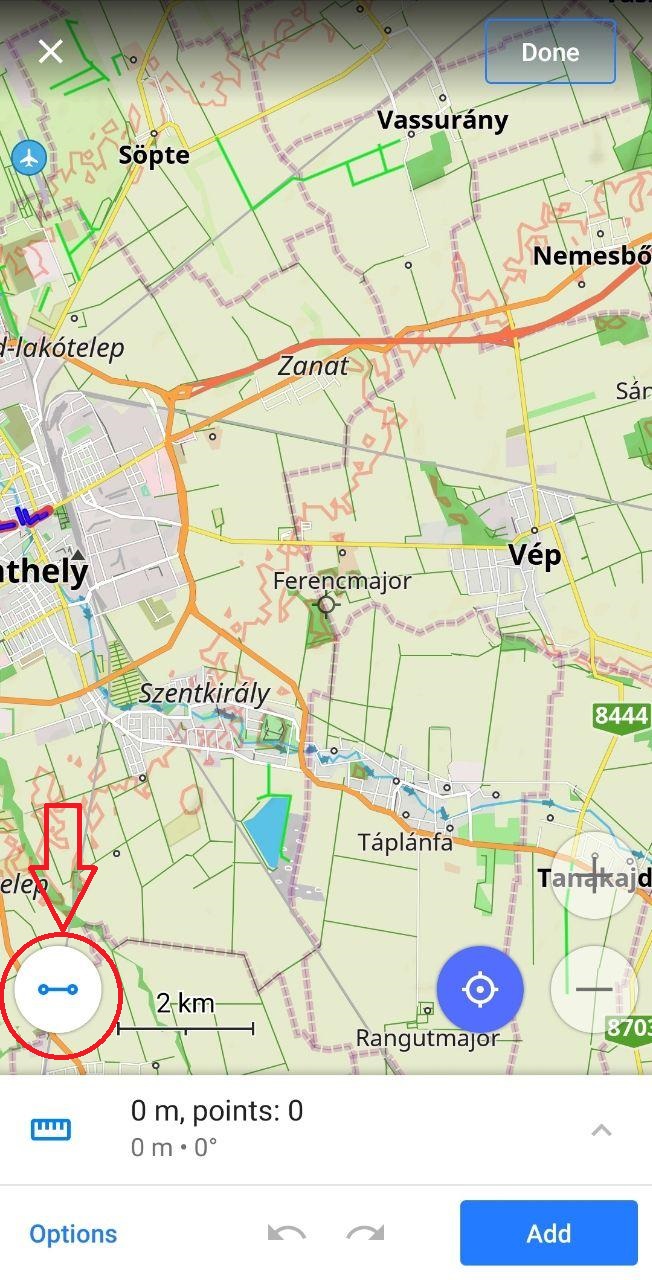
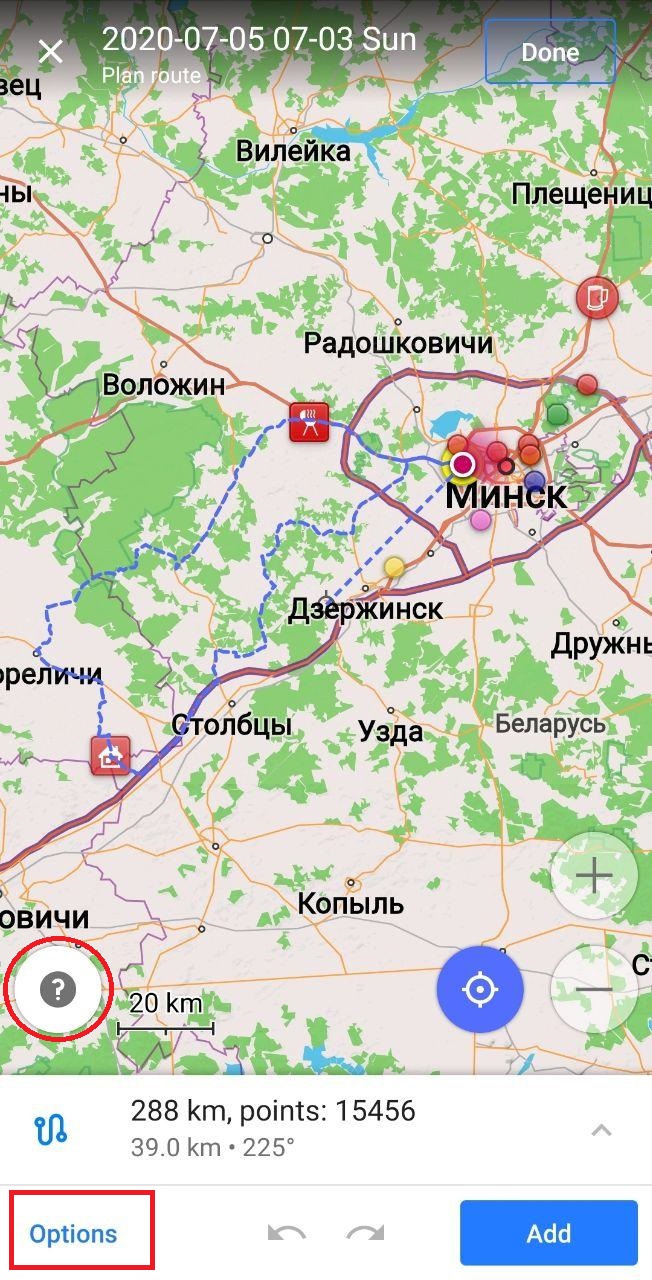
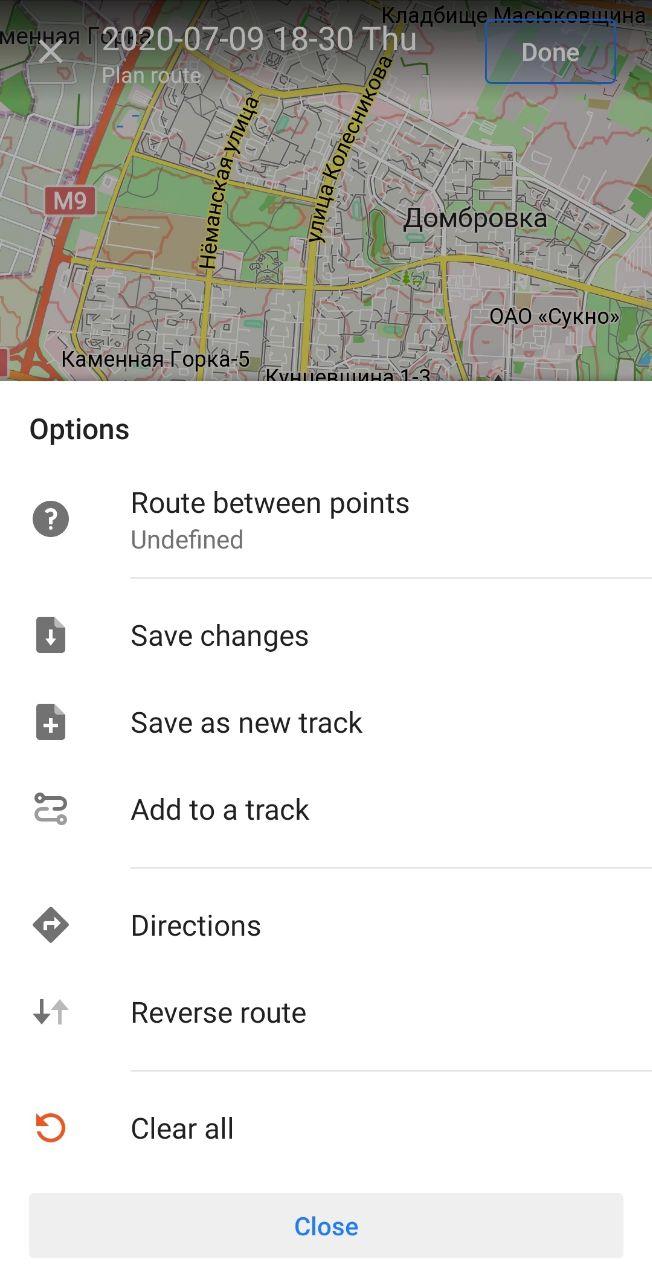
Now your chosen track is in plan route mode, where you can modify it for your trip. You can click the "Options" button and choose any parameters for it. In general, you can build a route between points. Click on this button on the screen or Options menu.
 |  |  |
|---|
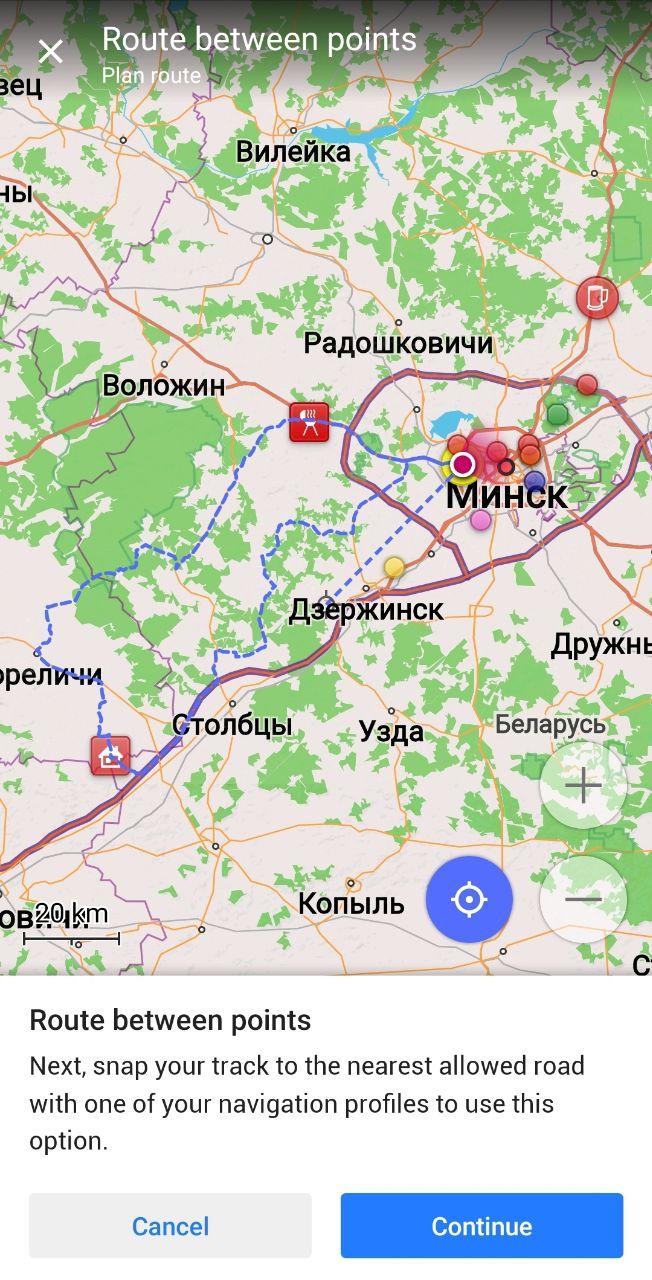
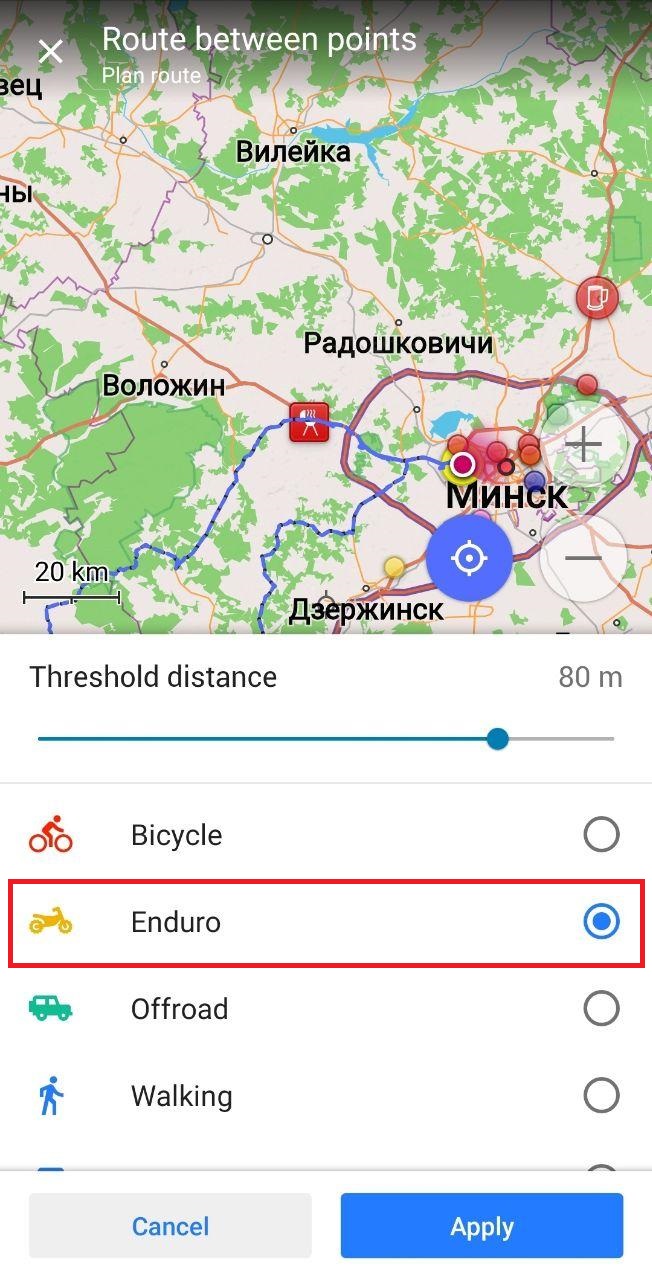
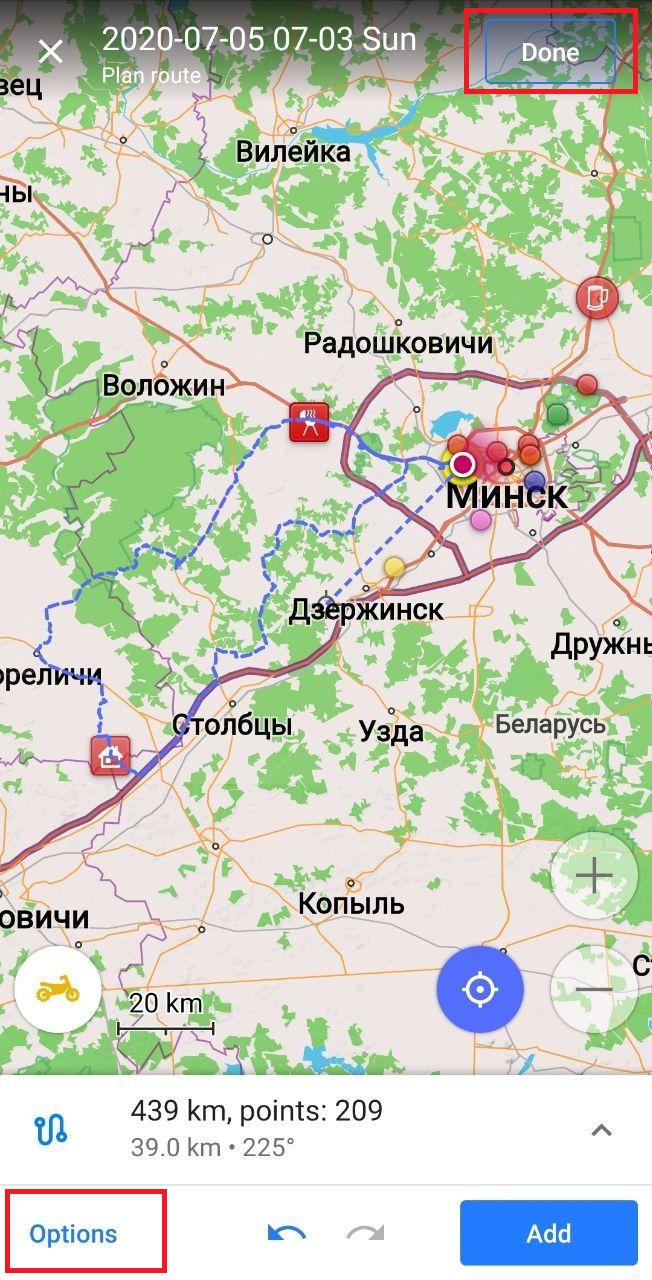
Next, snap your track to the nearest allowed road with one of your navigation profiles to use this option. Here we choose Enduro navigation profile and threshold distance for calculating our route. When a route is built we click the "Apply" button and "Done" to save a new track or "Options" → "Directions" for starting our trip.
 |  |  |  |
|---|
Here you see we can modify any track for a trip. Of course, you can delete or add points in "Plan a route" if you want to change your plan on this route.
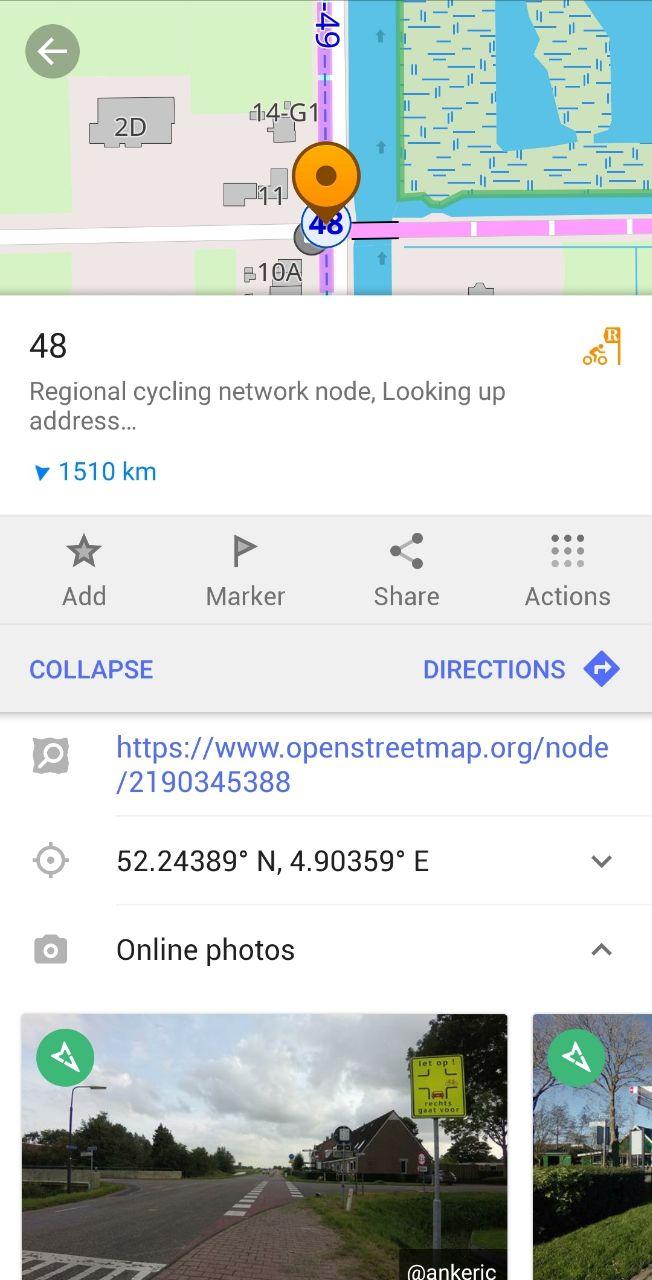
Improved bicycle nodes visibility
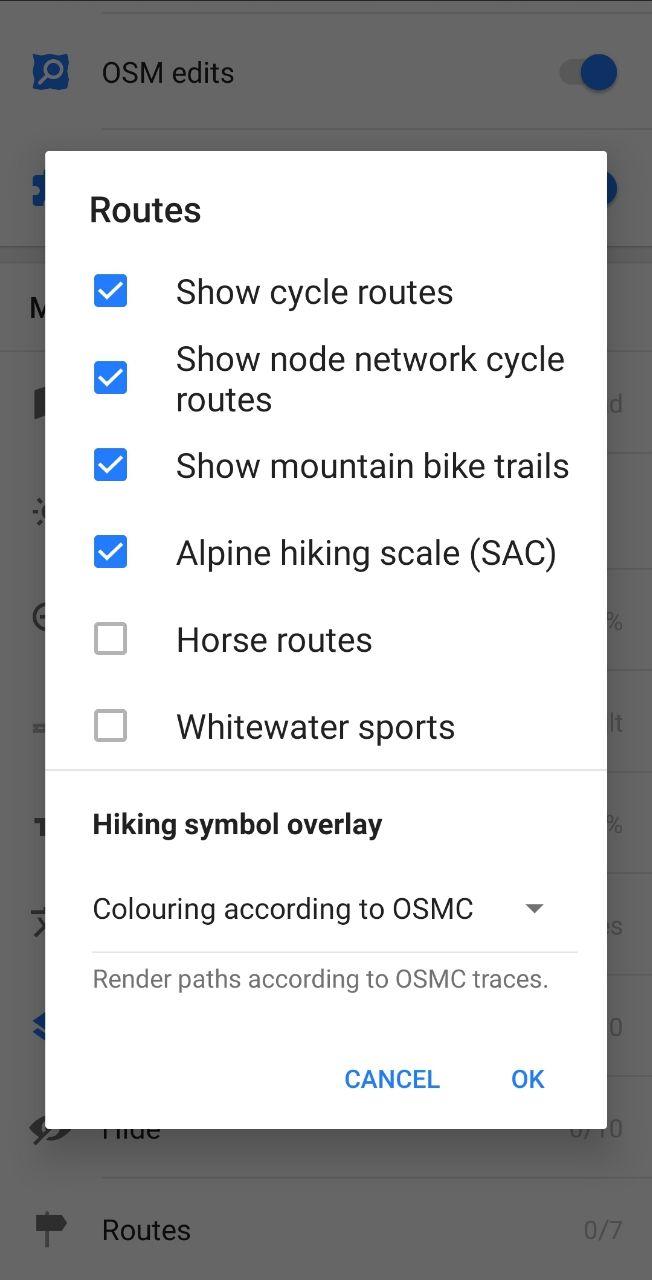
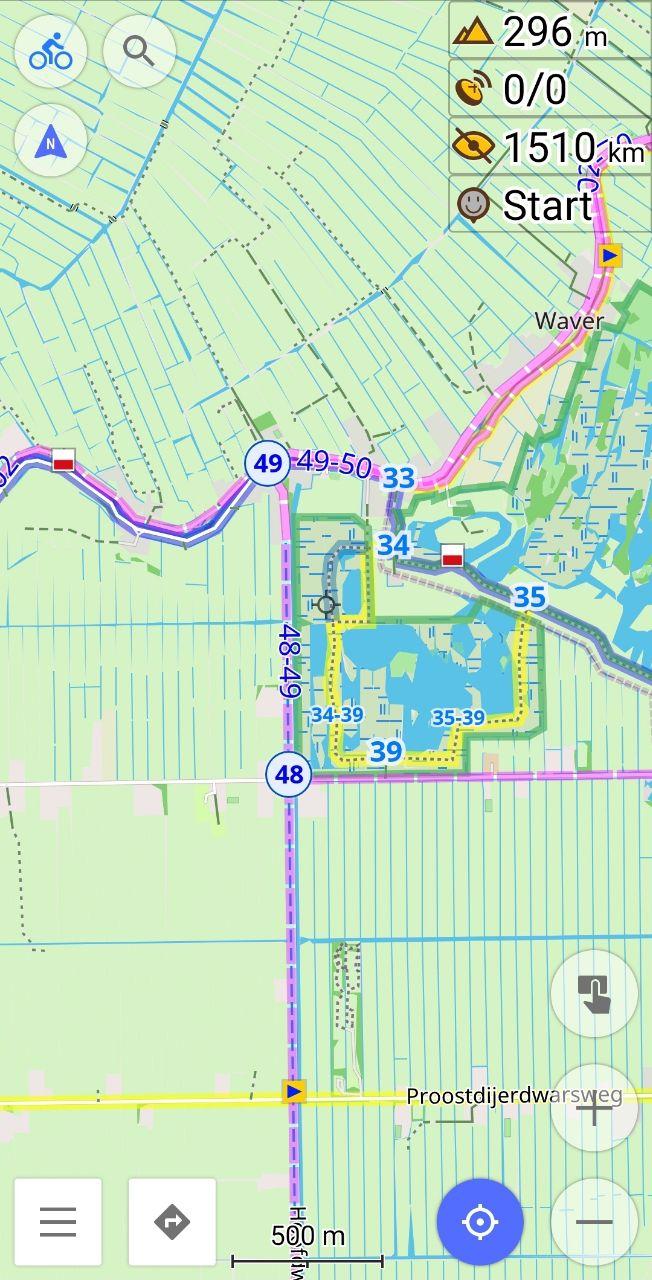
Good news for our users with bicycle trips! We improved bicycle nodes' visibility. First, to enable viewing nodes, go to menu → Configure profile (Cycling, for example) → Configure map → Routes. Then, in "Routes", choose "Show node network cycle routes".
 |  |  |  |
|---|
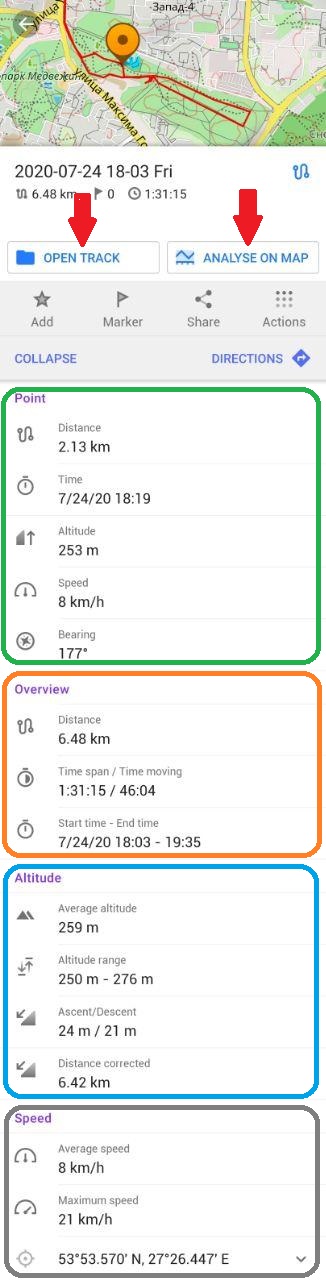
Context menu for tracks with basic info
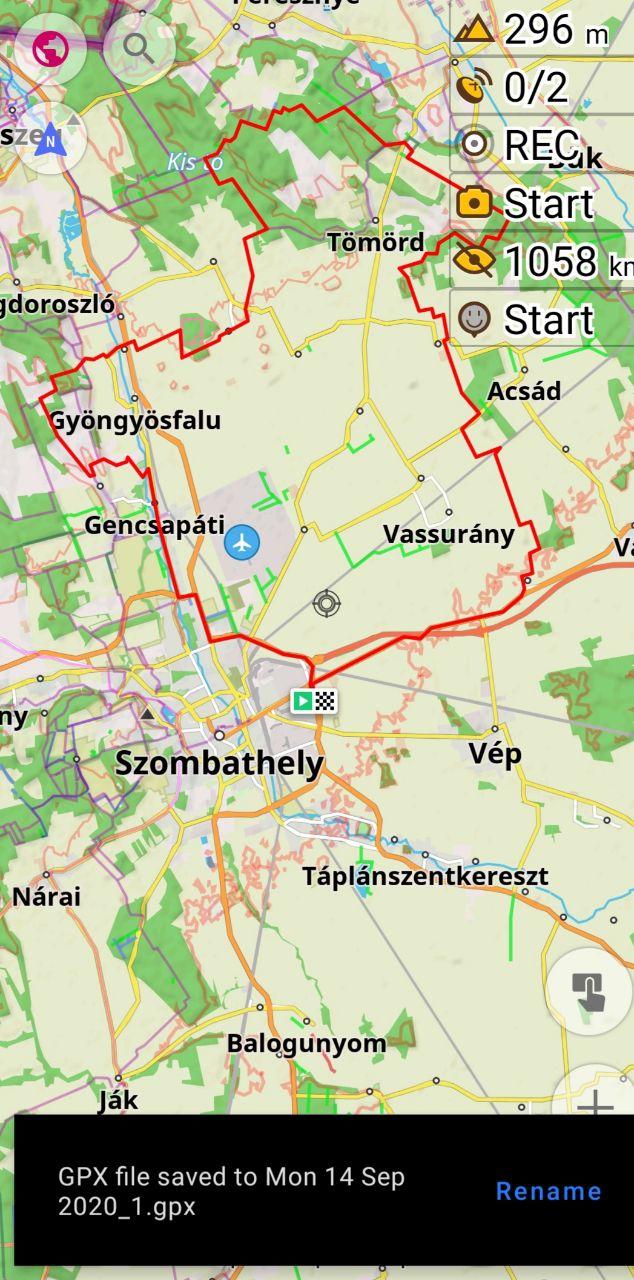
In this release we improved the context menu for tracks and added an opportunity to display the menu by tapping on a track directly on the map. When you tap the track you can see all infromation about it: points, overwiew, altitude, speed.
 |
|---|
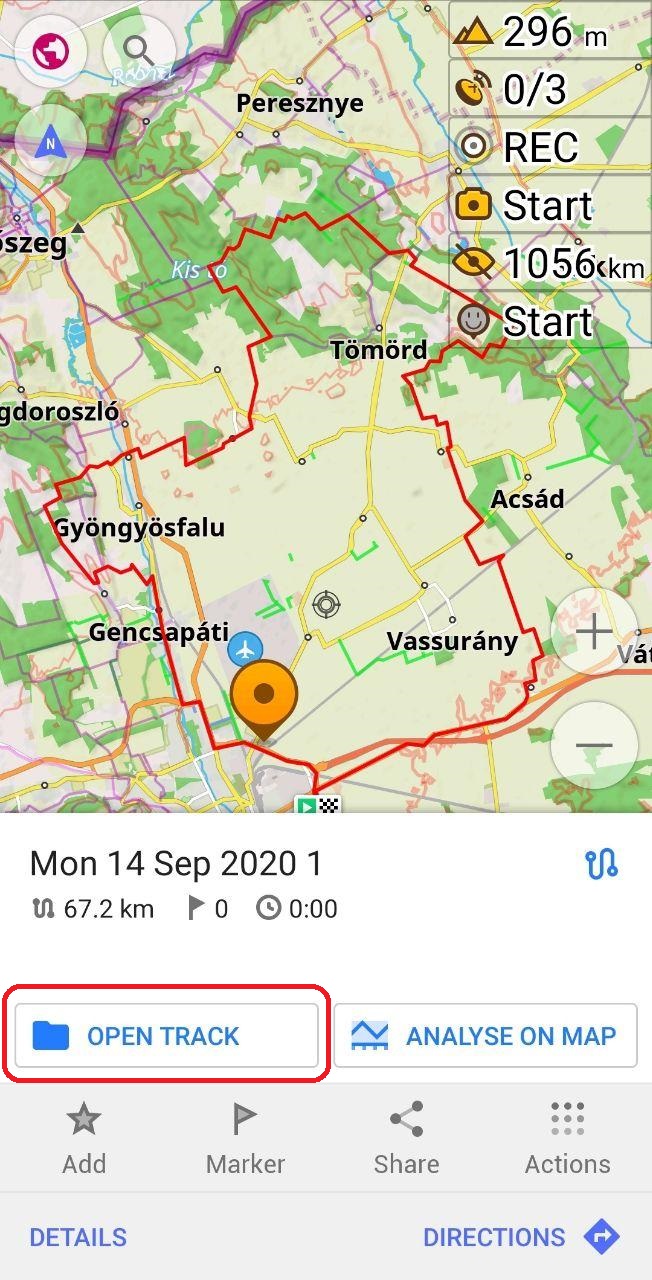
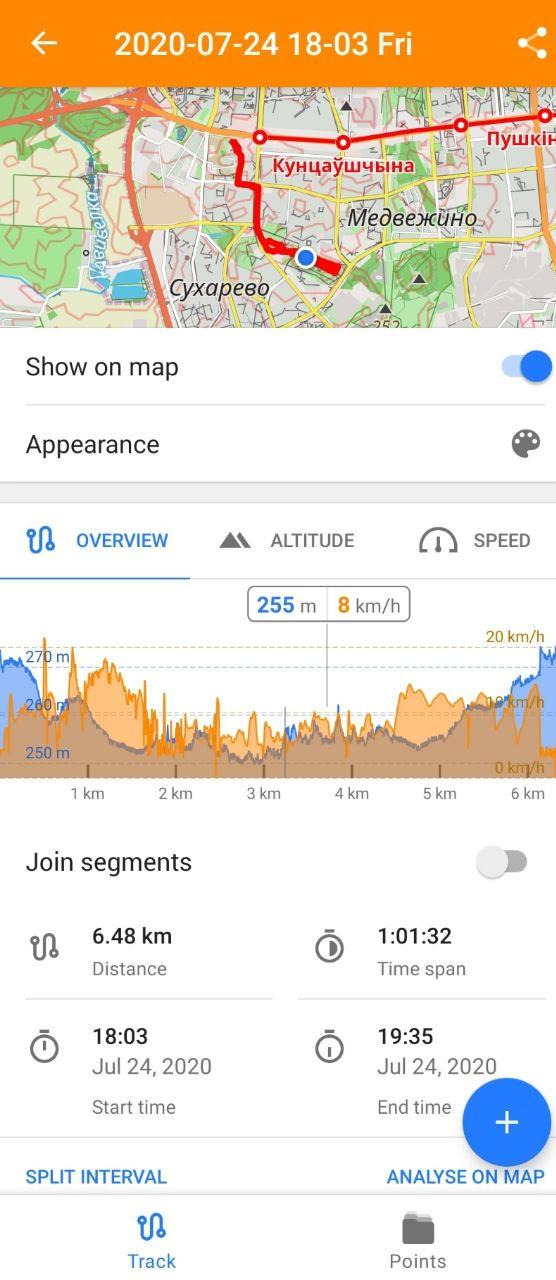
When you click the "Open Track" button, the track menu opens where you can change apperance of the track, turn on/off the track' display on the map, see graphs (overview, altitude, speed), join segments, split interval and analyse it on the map.
 |  |
|---|
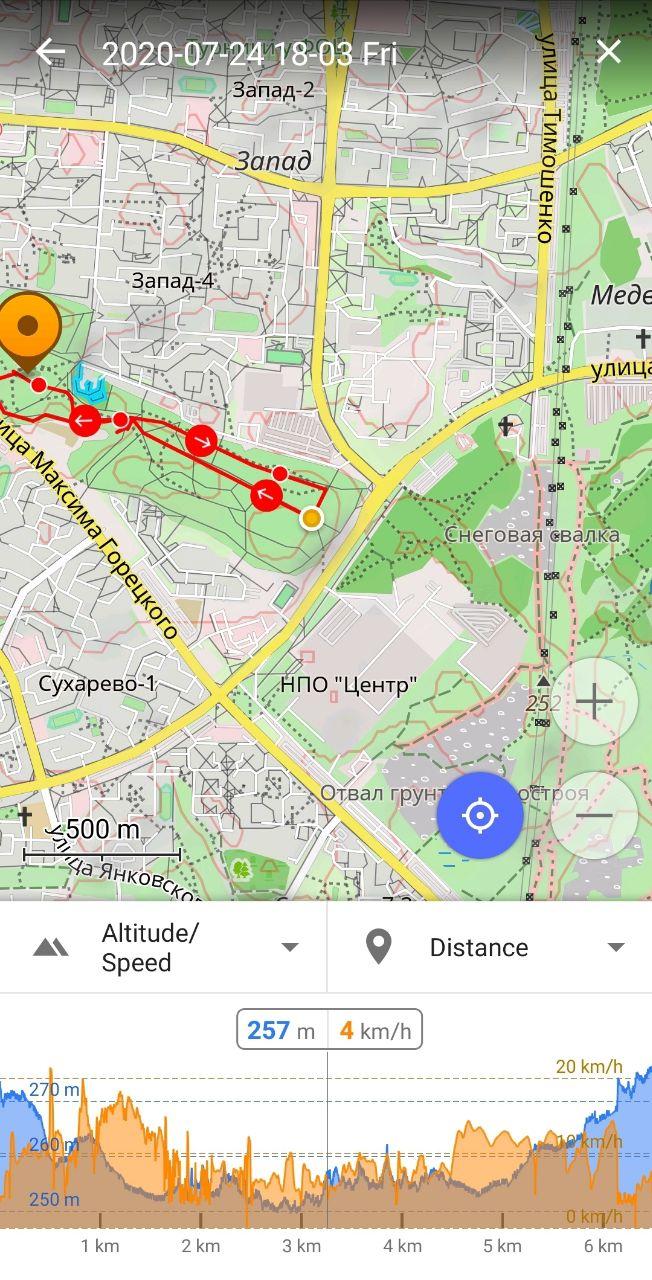
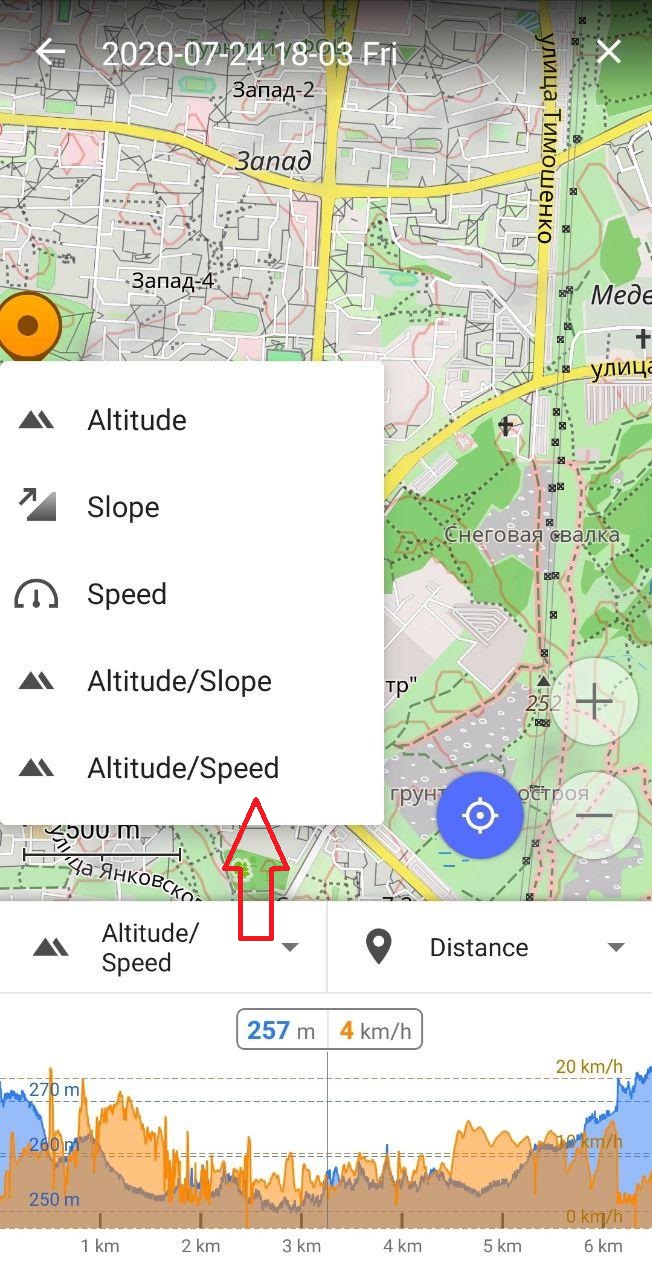
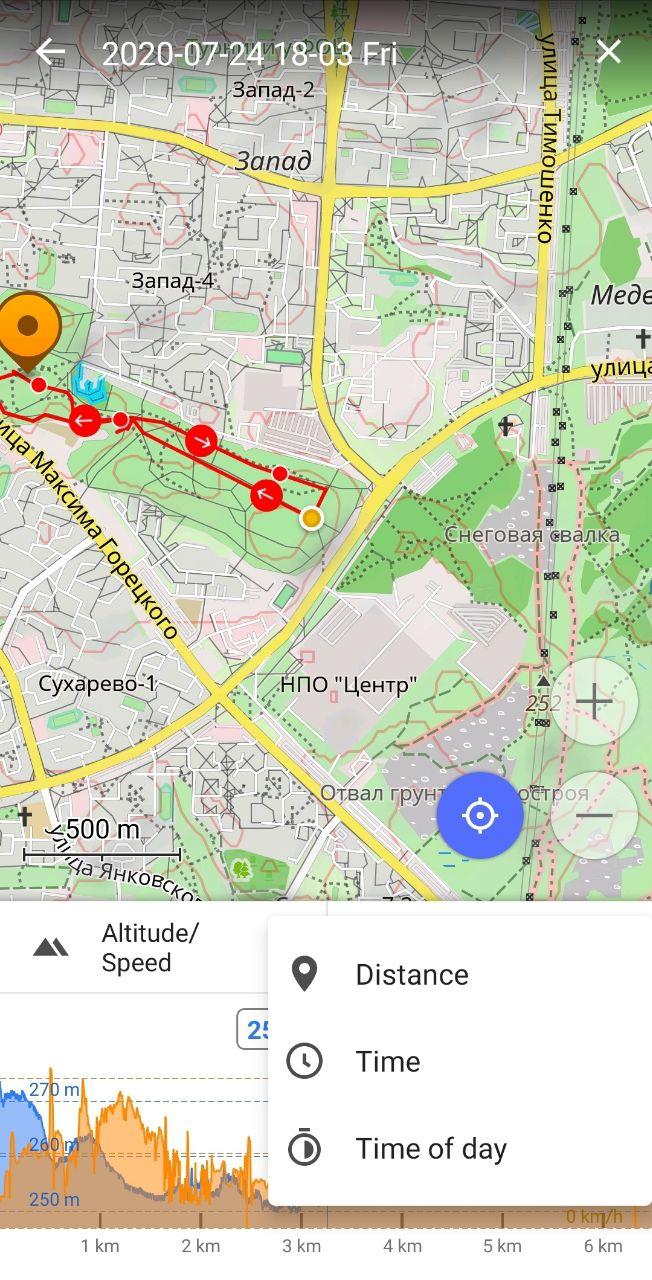
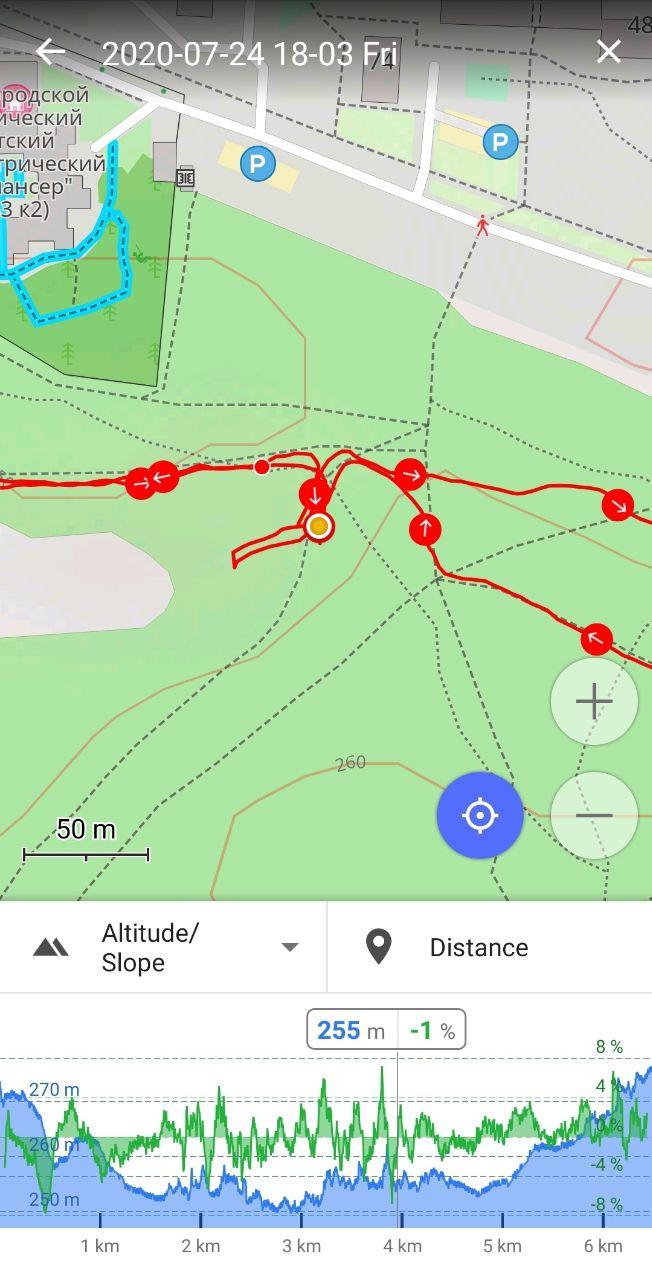
When you click the "Analyse on map" button, you can see all the necessary information about altitude, speed, slope in each point of your track in graphs and on the map.
When you click the "Open Track" button, you can see the track menu where you can change the appearance of the track, turn on/off the track' display on the map, see graphs (overview, altitude, speed), join segments, split interval and analyse it on the map.
 |  |  |  |
|---|
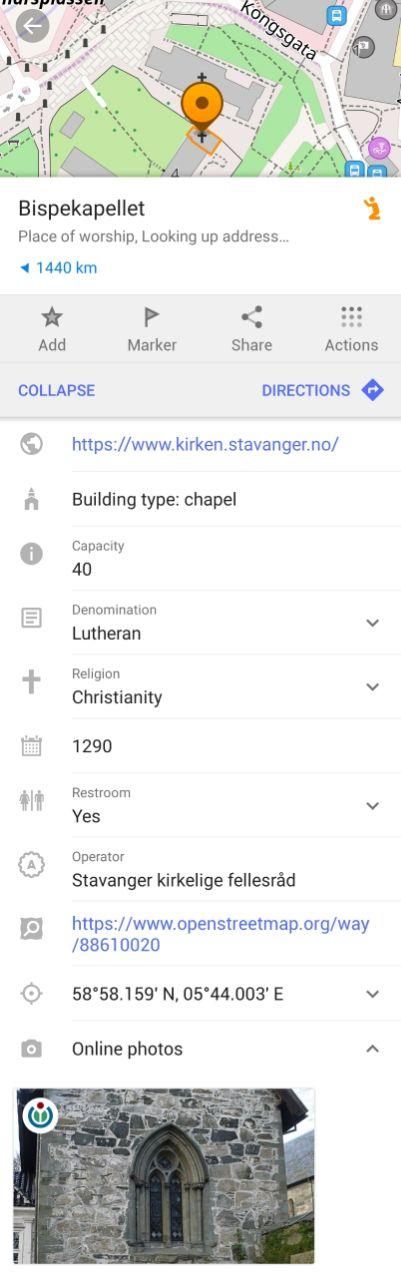
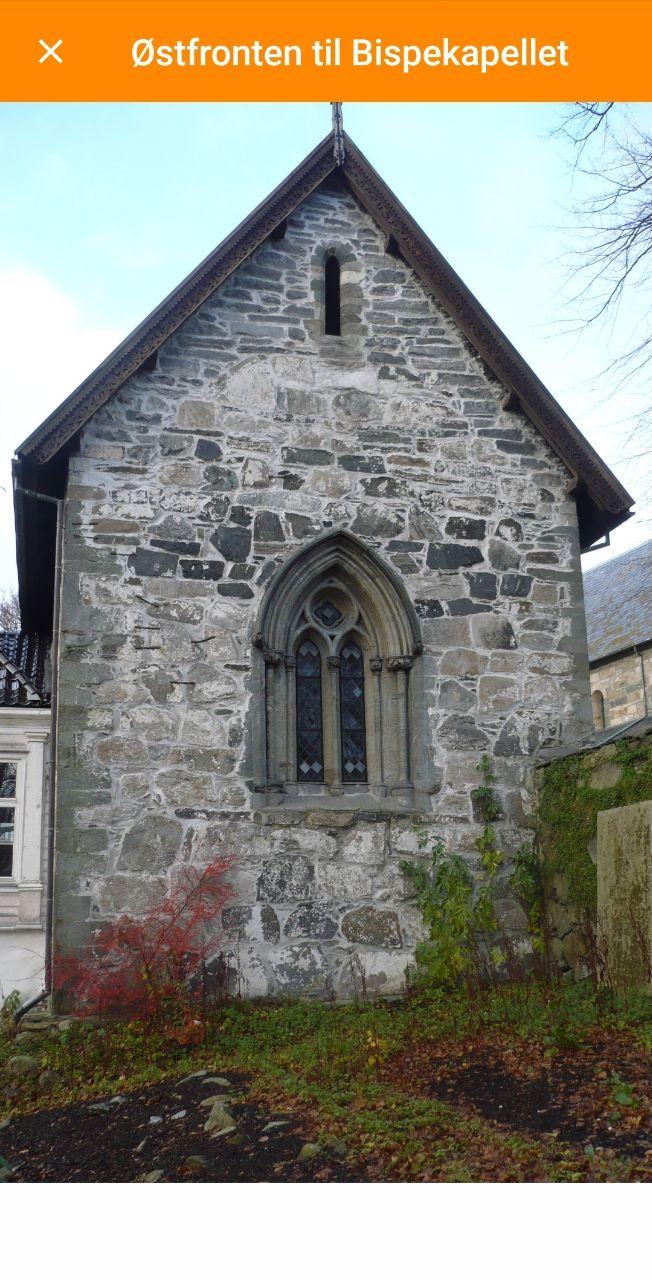
Added data sources for Online photos
We added more data sources for Online photos, in addition to the existing Mapillary photos: Wikidata, Wikimedia Commons. When you click a POI or polygon you can find more pictures in Online photos.
 |  |
|---|
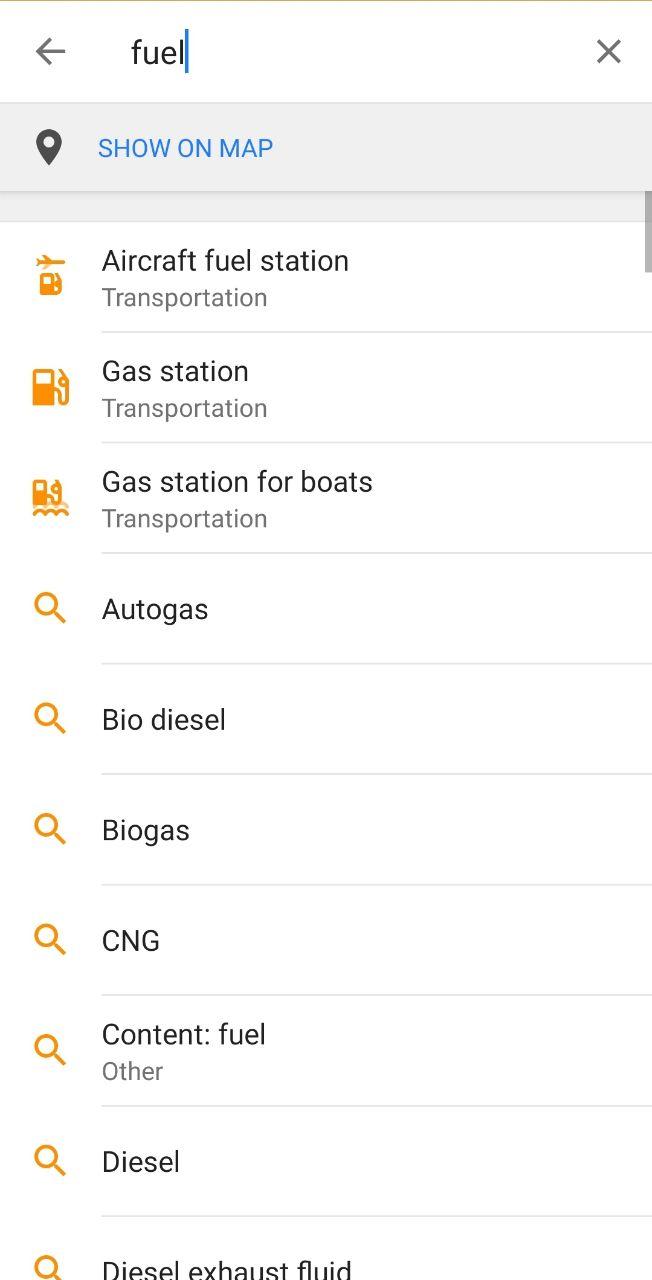
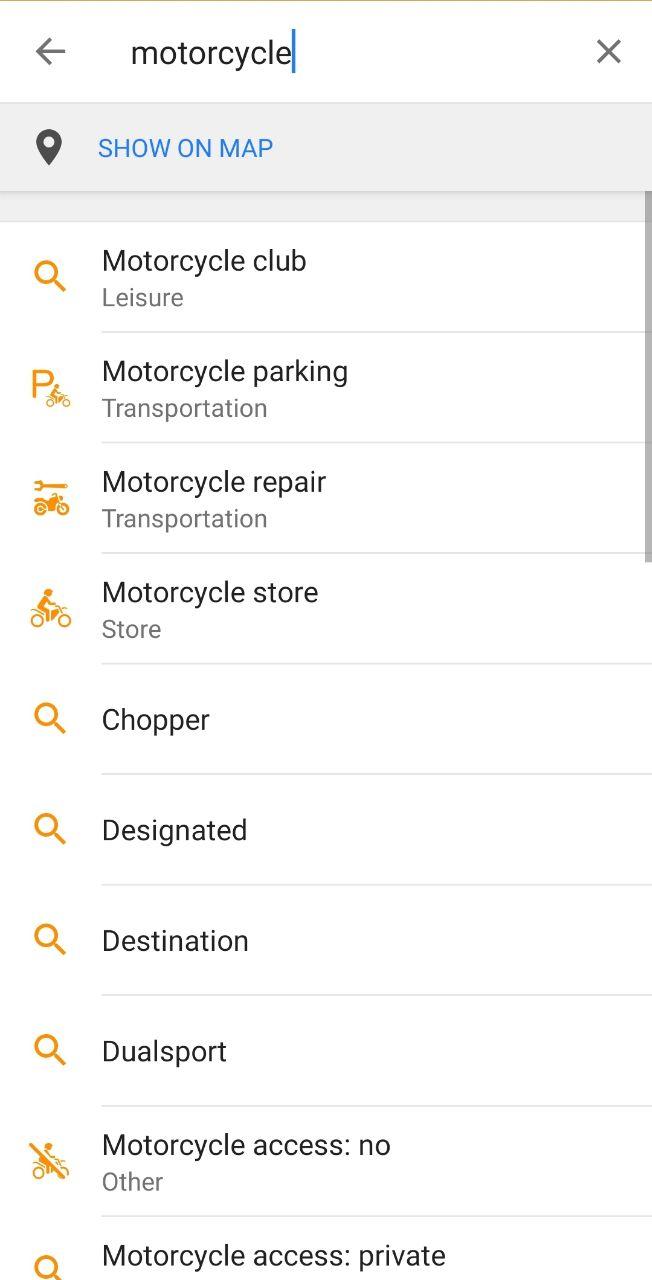
Improved "Search" algorithms
We fixed many bugs in our search algorithms. Now you can find places, points, etc. without any problems.
 |  |
|---|
Improved "Follow track" options in Navigation
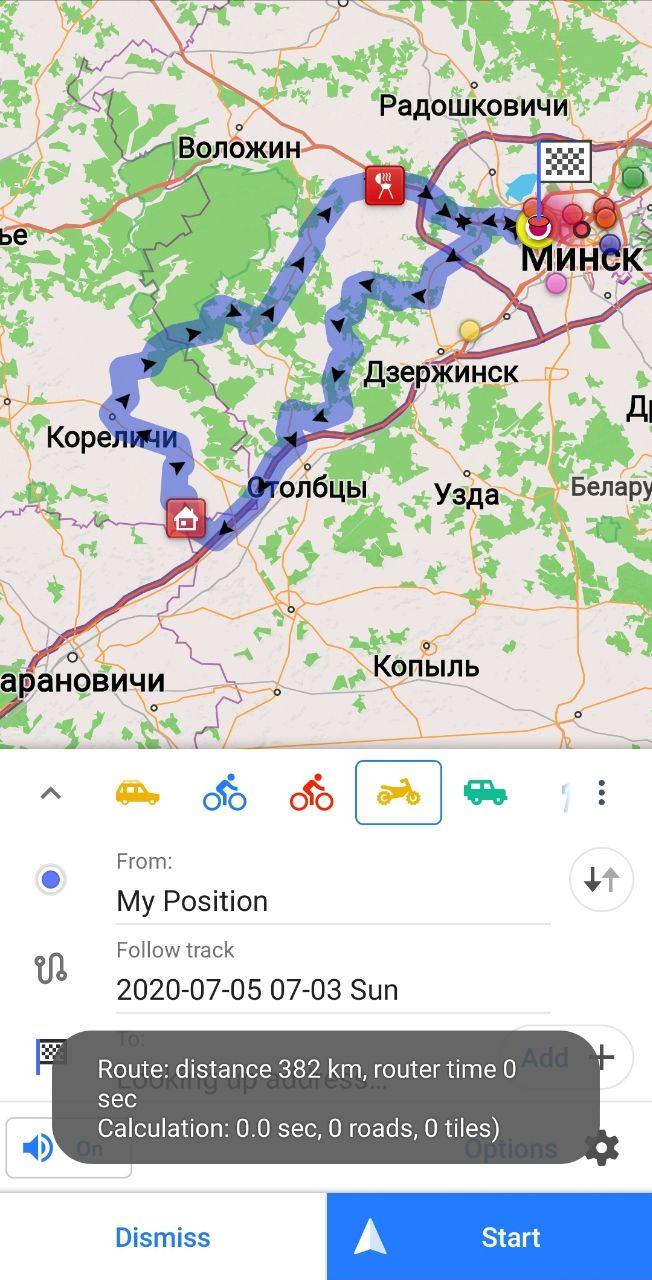
Click Navigation button in General screen → Option → Follow track. Here you can choose a track to follow or to import from your device.
 |
|---|
Fixed issues with import/export of profile settings
We fixed issues with importing/exporting of profile settings for Custom package and Navigation profiles.
What else is in this release?
• Fix bugs with RTL
And remember that only together we can achieve the best results! New features are coming SOON!
Follow OsmAnd on Facebook, TikTok, X (Twitter), Reddit, and Instagram!
Join us at our groups of Telegram (OsmAnd News channel), (EN), (IT), (FR), (DE), (UA), (ES), (BR-PT), (PL), (AR), (TR).

